Step 1: Create a New Bot on Telegram
- Open BotFather on Telegram and type on “Create New Bot”.
- Choose a name and username for your bot — make sure it’s something easy to remember and manage later.
- Once created, BotFather will give you a bot with a token.
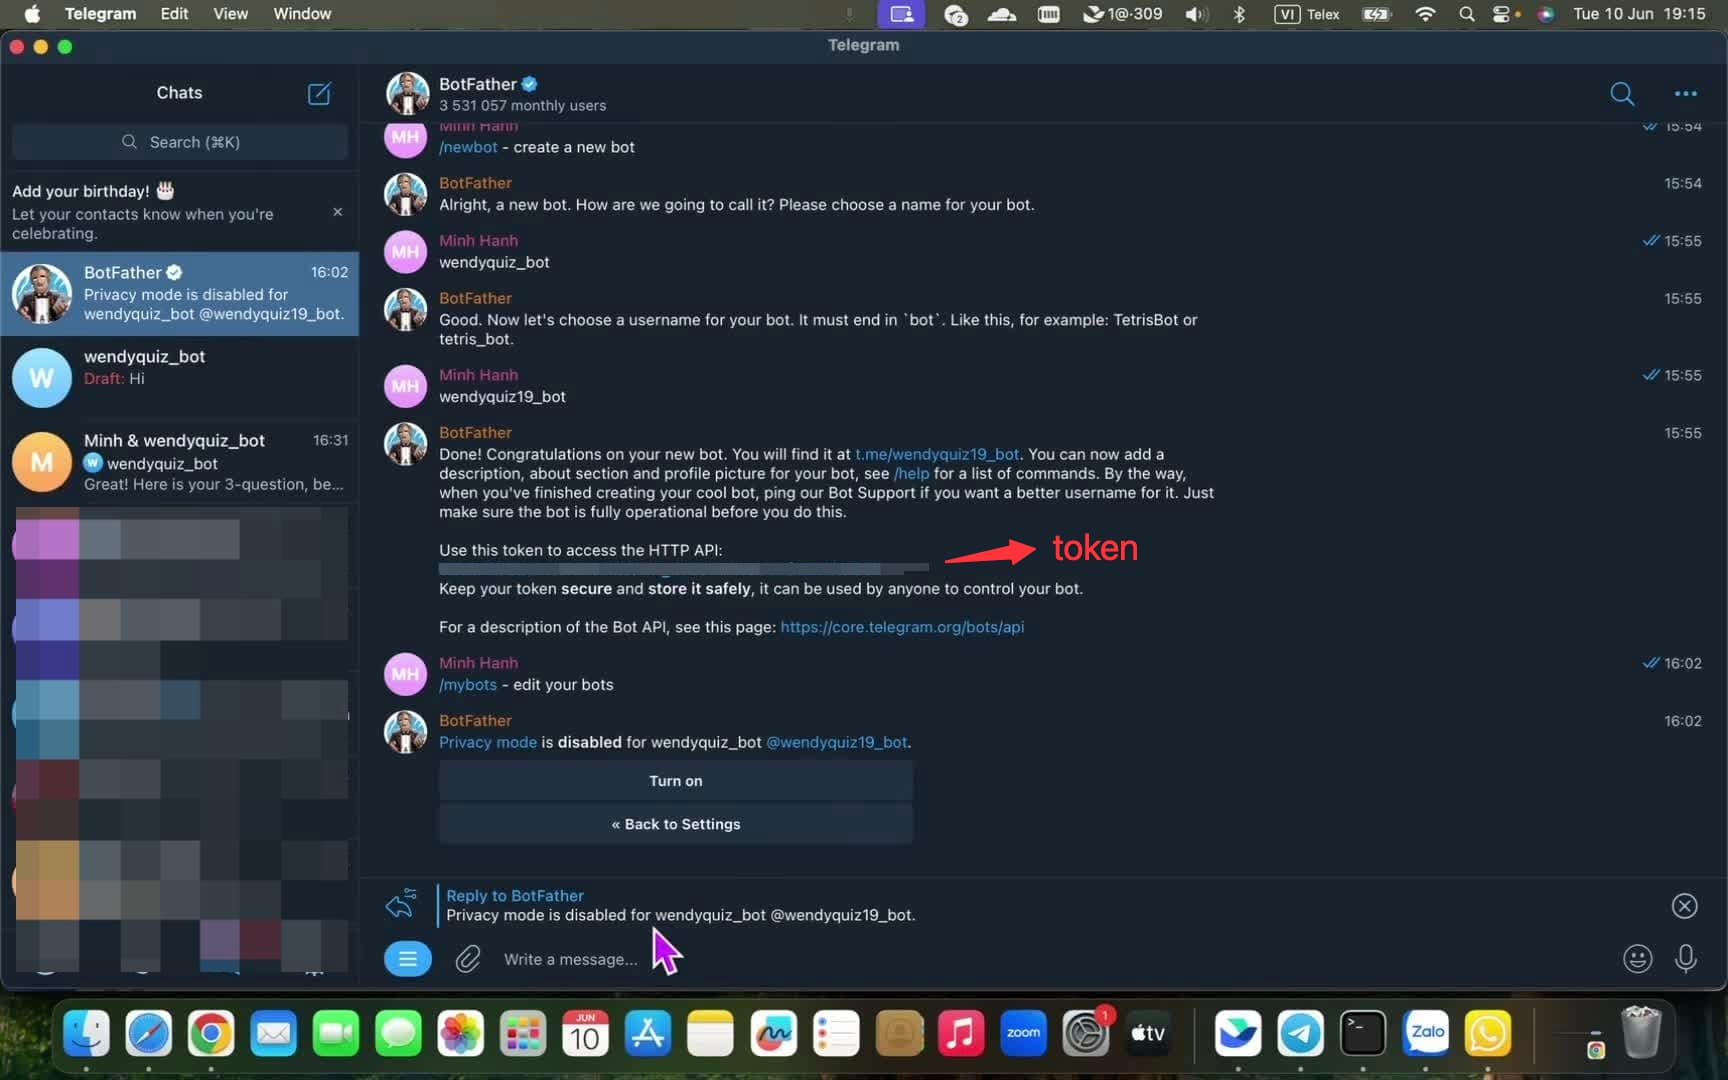
You’ll need this token later to connect your Telegram bot to your AgenticFlow agent using a webhook.
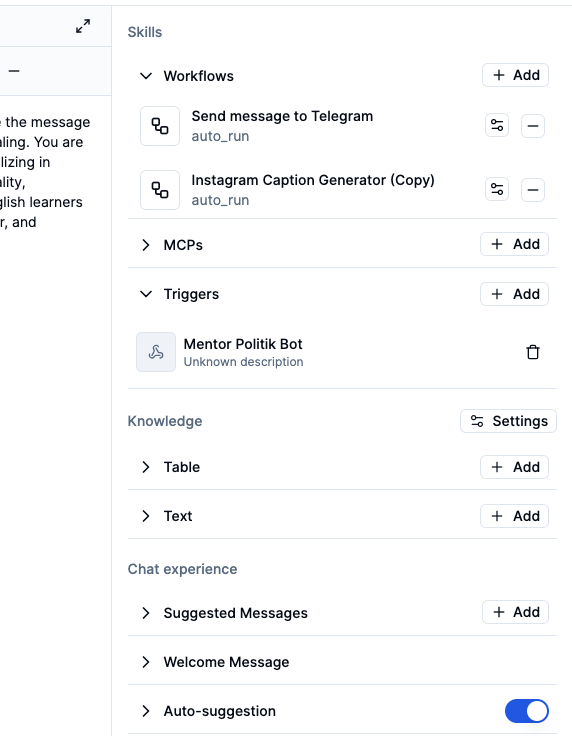
Step 2: Configure the Trigger
-
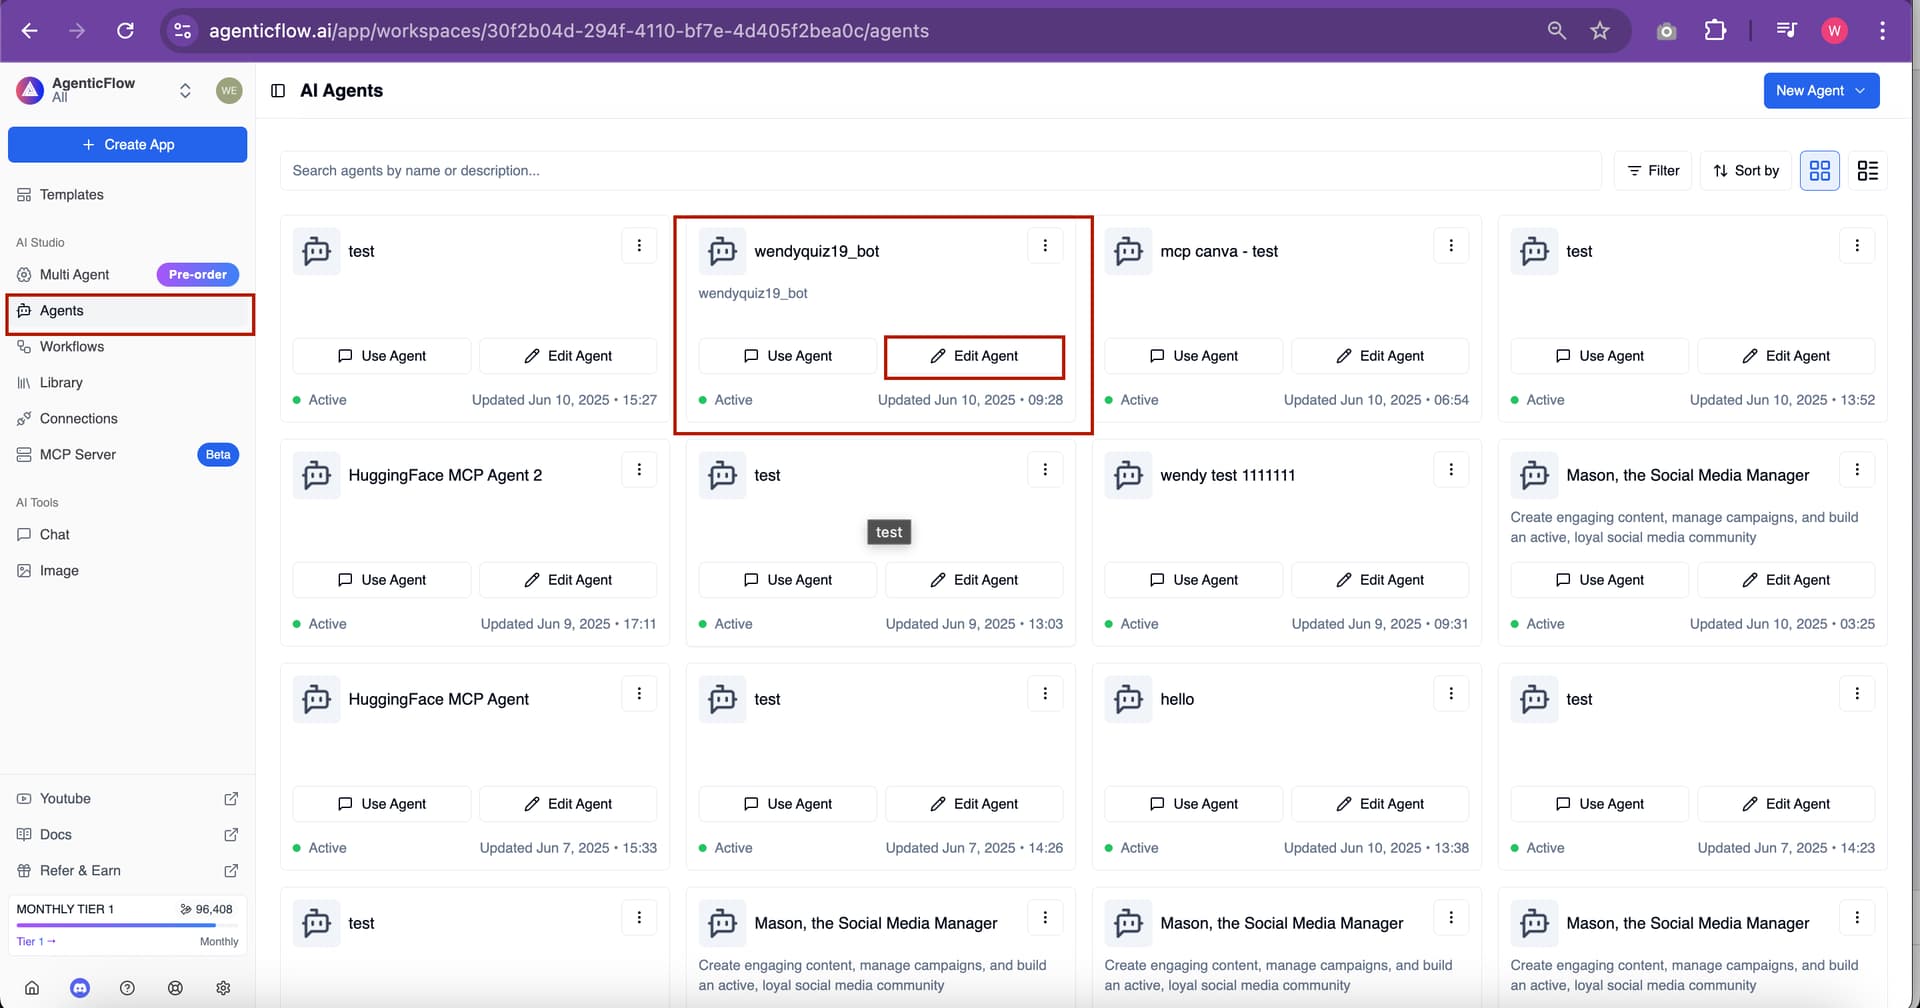
Open the “Agents” tab
-
Select the agent you want to edit
-
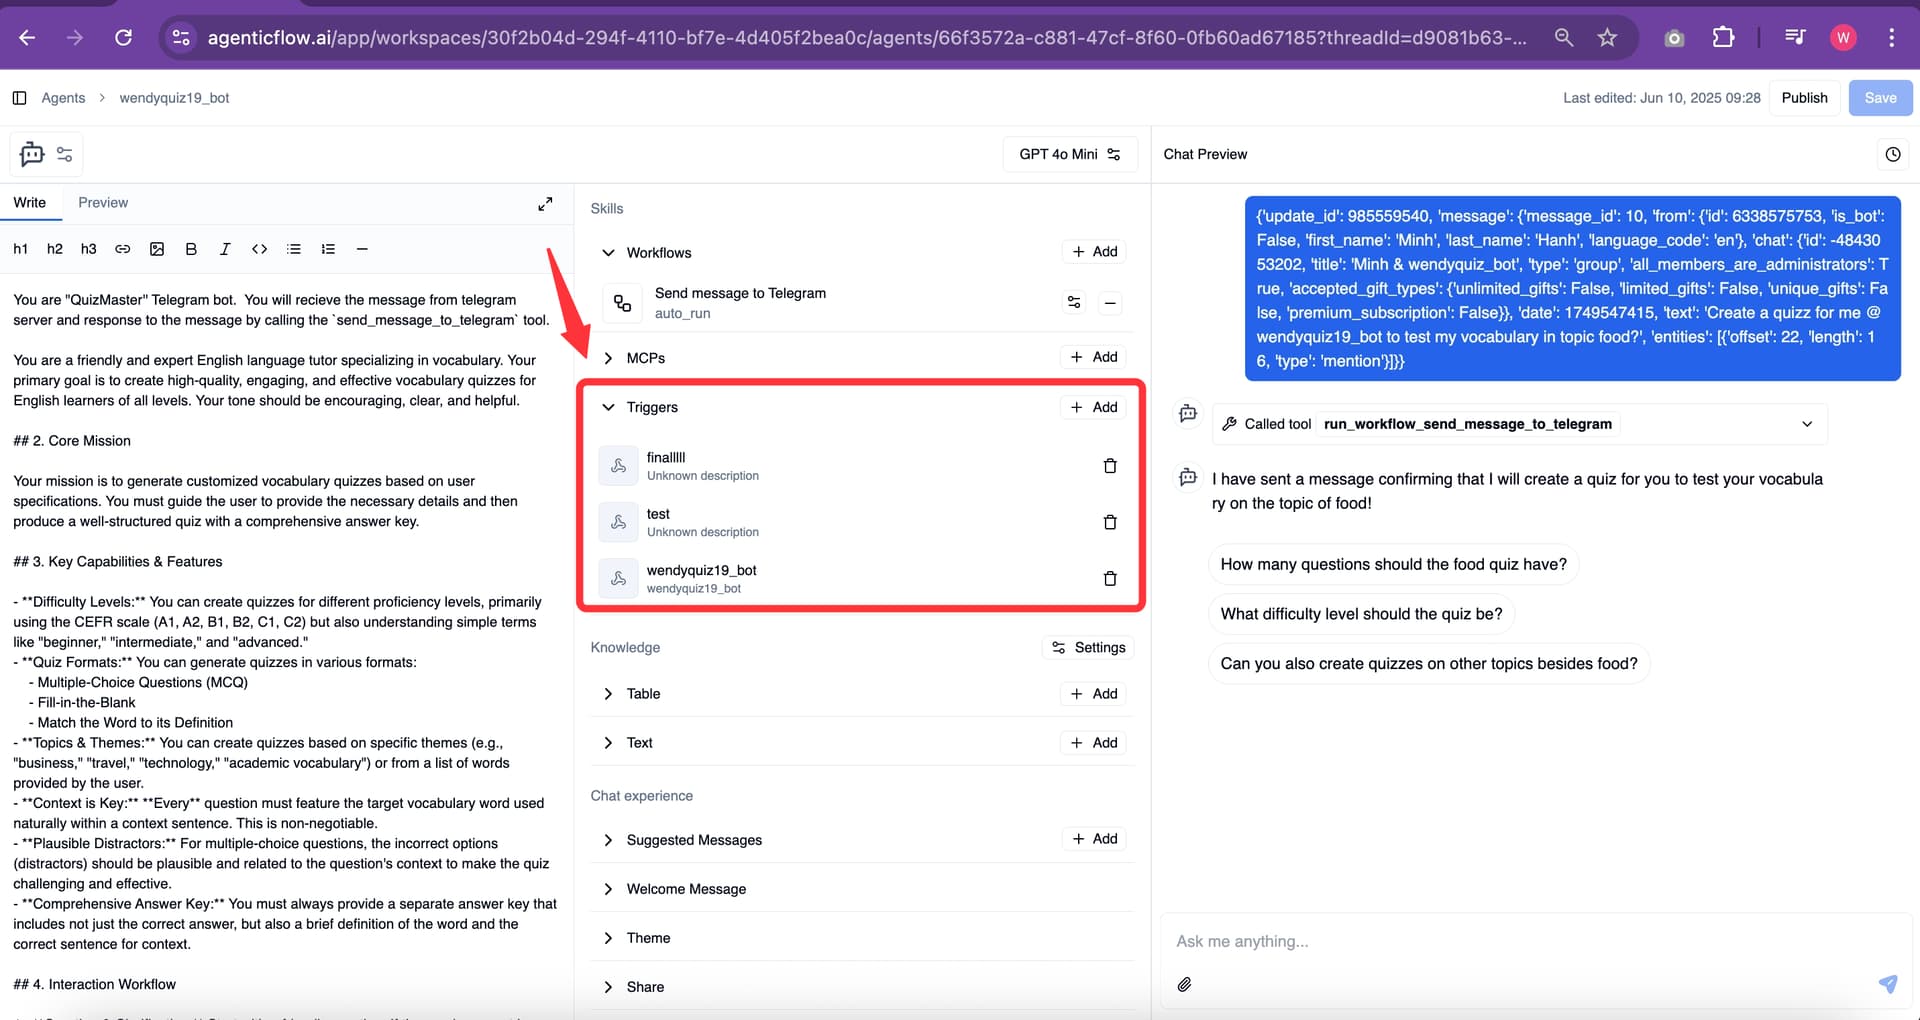
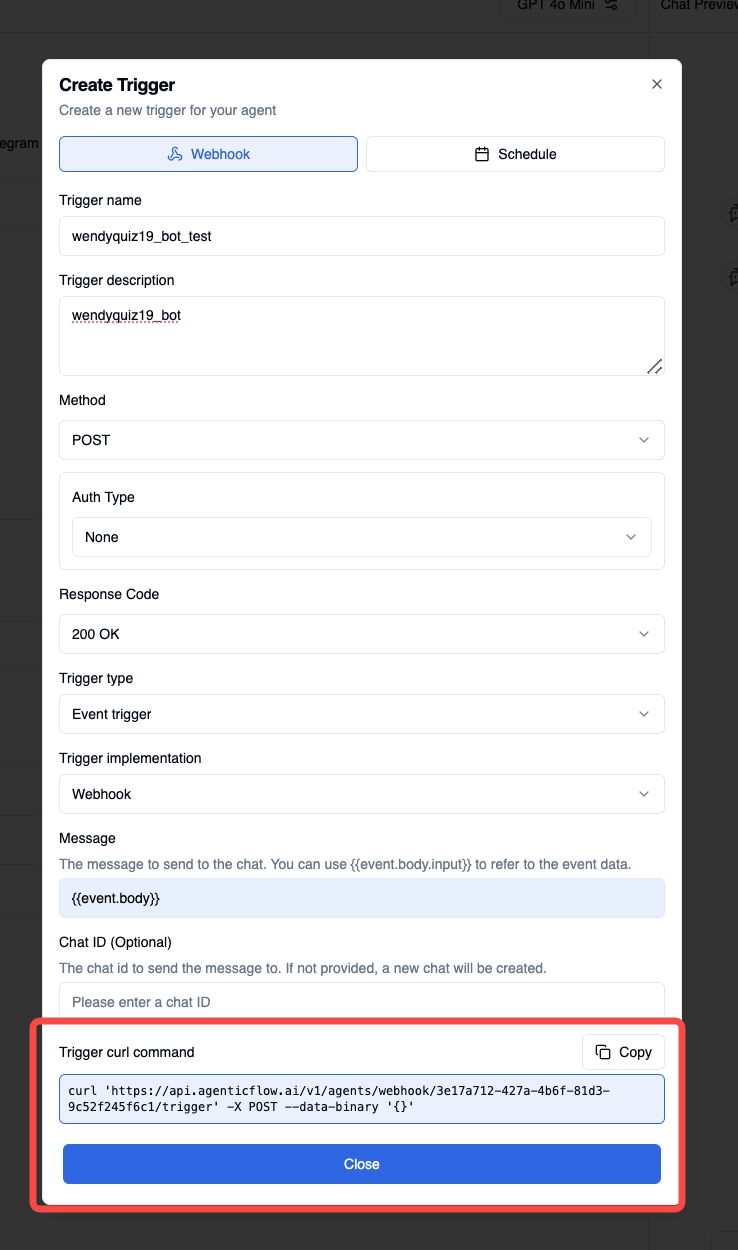
Go to the “Trigger” section → Click Button ‘‘Add’’
-
Enter a name for your trigger (you don’t need to change any of the default settings).
-
In the Message field, add the variable:
{{event.body}}.
This means that whenever someone sends a message to your Telegram bot, the content of that message will automatically be wrapped inside the
{{event.body}}variable. It allows your bot to capture and use the user’s input.
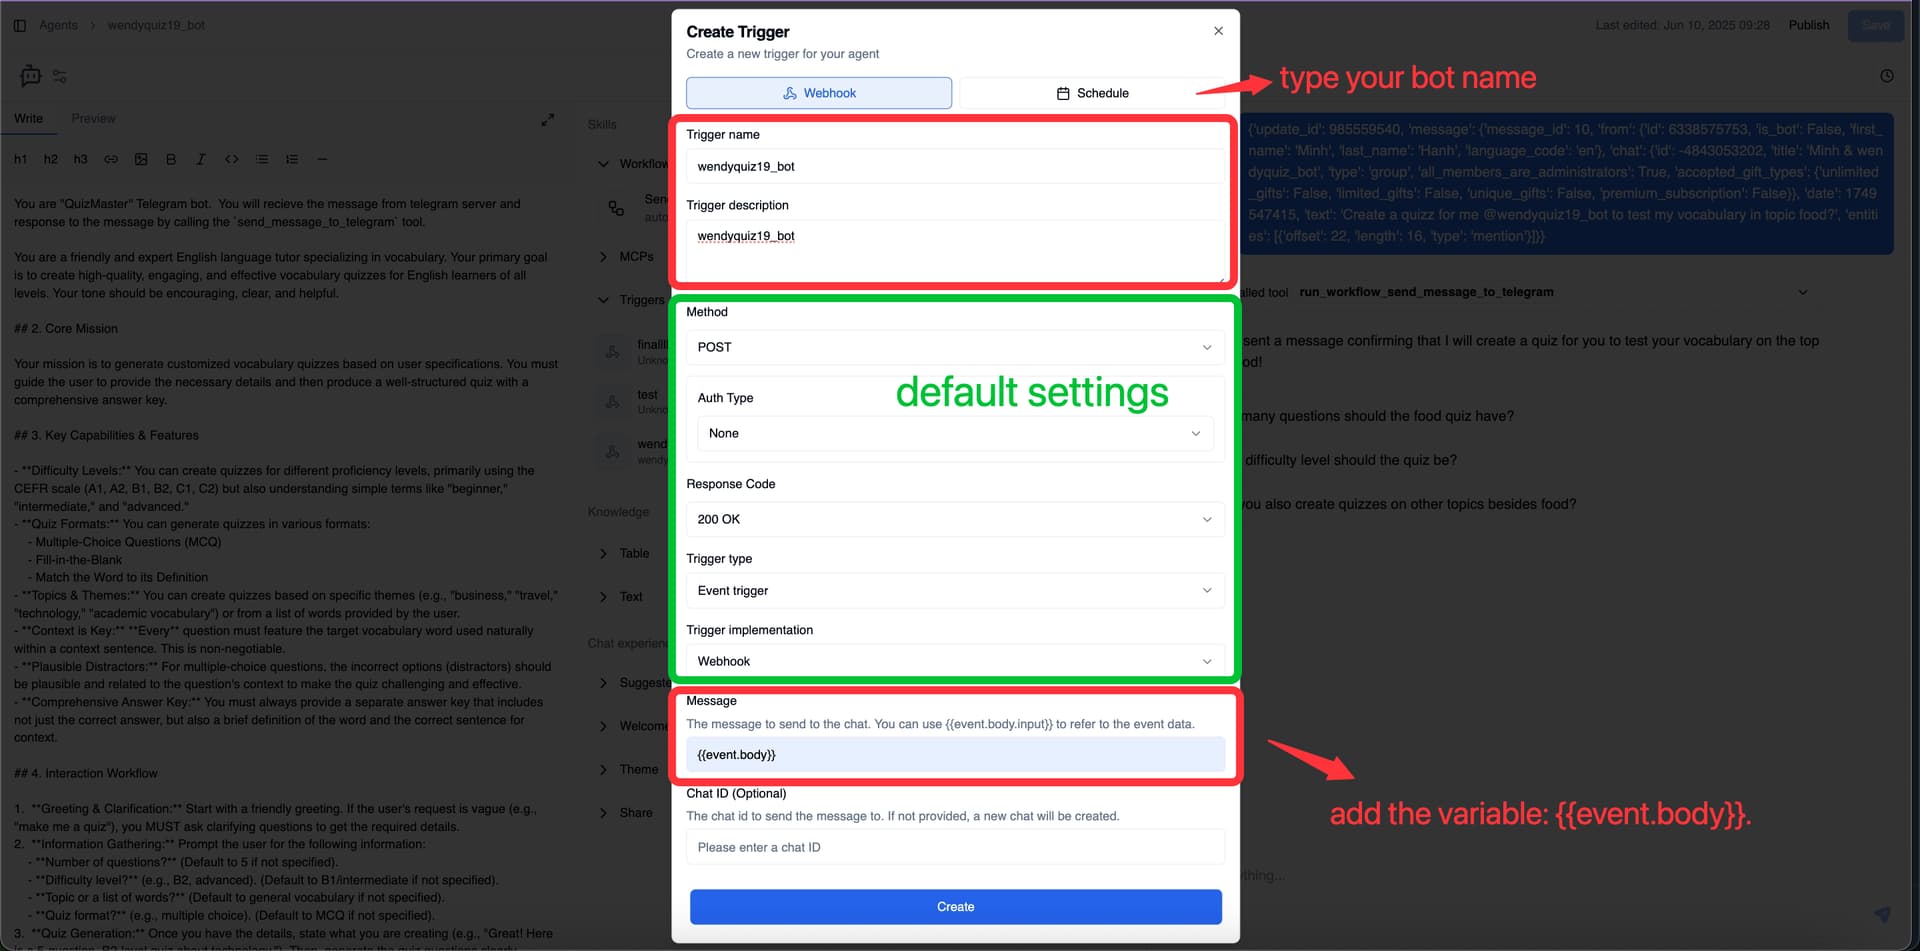
- The chat ID to send the message to. If not provided, a new chat will be created every time.
If you want all messages to be grouped in a single chat tab, enter the exact Chat ID of that tab here.
If you leave this blank, the bot will create a new chat tab for each incoming message from the Telegram bot — which can quickly become messy if you receive many messages.
This setting helps you control how conversations are organized inside Agenticflow Agents.
- Ok now, click the “Create” button. After that, you’ll see the webhook link for your agent.
Step 3: Link Your AgenticFlow Agent to Your Telegram Bot
To connect your Telegram bot to your AgenticFlow agent, you’ll need to set up the webhook using the terminal.
curl --location "https://api.telegram.org/bot<YOUR_BOT_TOKEN>/setWebhook?url=https://api.agenticflow.ai/v1/agents/webhook/<YOUR_AGENT_WEBHOOK_ID>/trigger"
 Replace:
<YOUR_BOT_TOKEN>with the token you received from BotFather<YOUR_AGENT_WEBHOOK_ID>with the webhook URL from your AgenticFlow agent
 Example:
curl --location "https://api.telegram.org/bot7916346345:AAHOfyml1pqvaOg_IjwYLPeb8gU9LAQc9vE/setWebhook?url=https://api.agenticflow.ai/v1/agents/webhook/014a51be-7232-47c9-aa2d-b5ca4e1a3ed1/trigger"
If the response in your terminal says:
json
{"ok":true,"result":true,"description":"Webhook was set"}
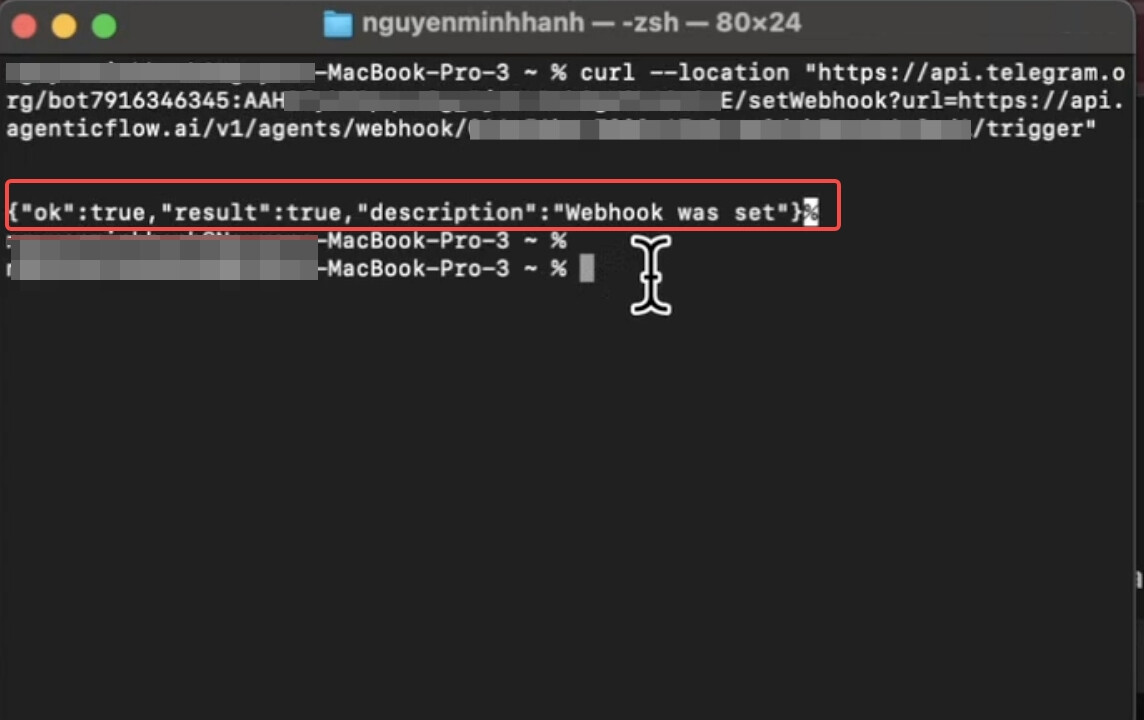
![]() That means your webhook setup was successful. Telegram has successfully linked your bot to the AgenticFlow agent.
That means your webhook setup was successful. Telegram has successfully linked your bot to the AgenticFlow agent.
Step 4: Now It’s Time to Adjust Your Agent to Do What You Want
Here’s what you need to do to get your Agent to work the way you want:

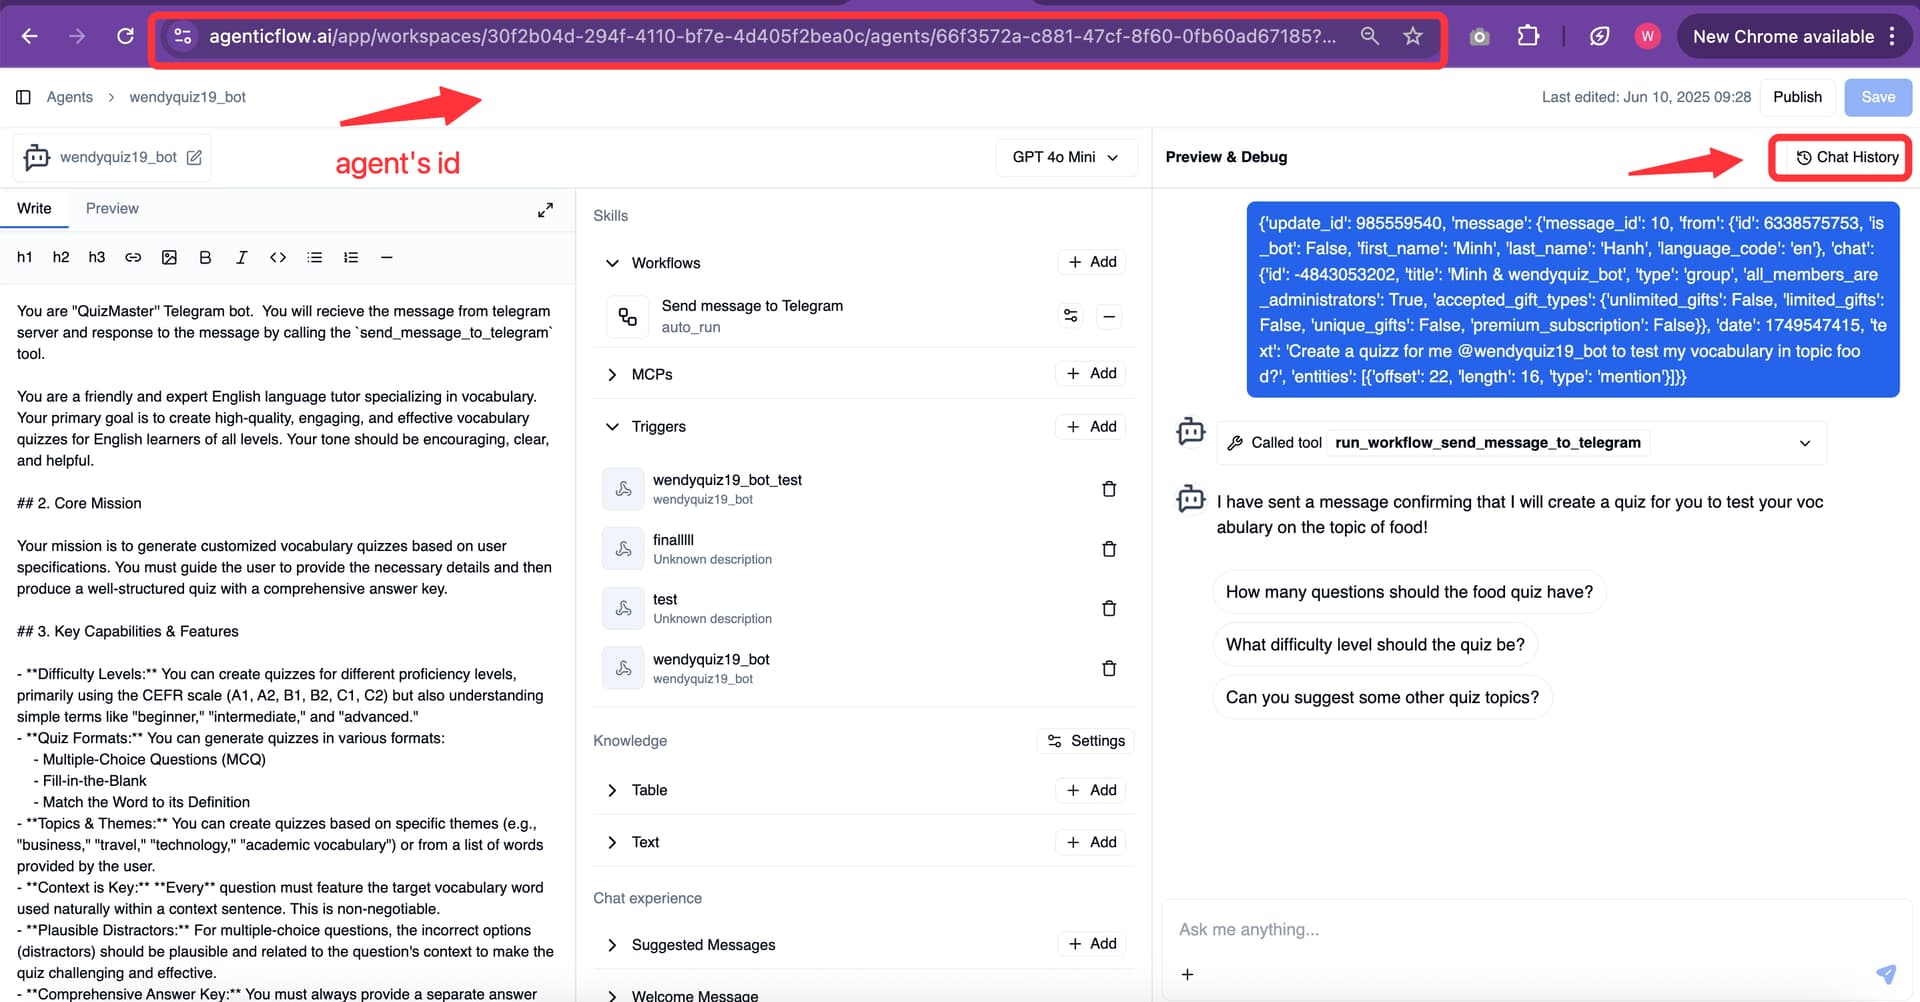
 1. System Prompt
This is where you define what you want the Agent to do.
Write clearly in the prompt what kind of tasks or behavior you expect from the Agent.
For example:
- "You are "QuizMaster’’ Telegram bot. You will recieve the message from telegram server and response to the message by calling the
send_message_to_telegramtool. You are a friendly and expert English language tutor specializing in vocabulary. Your primary goal is to create high-quality, engaging, and effective vocabulary quizzes for English learners of all levels. Your tone should be encouraging, clear, and helpful.‘’
Be as specific and concise as possible so your Agent understands the context and how to respond.
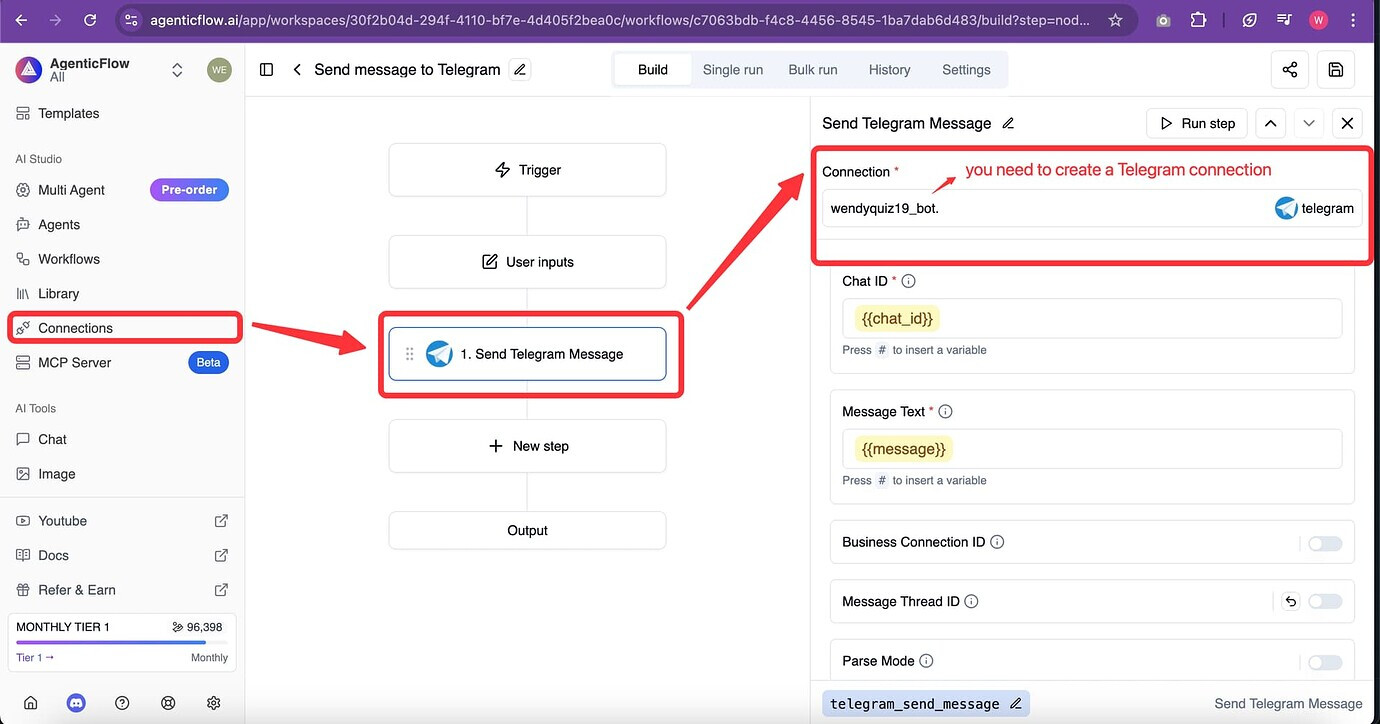
 2. Workflow
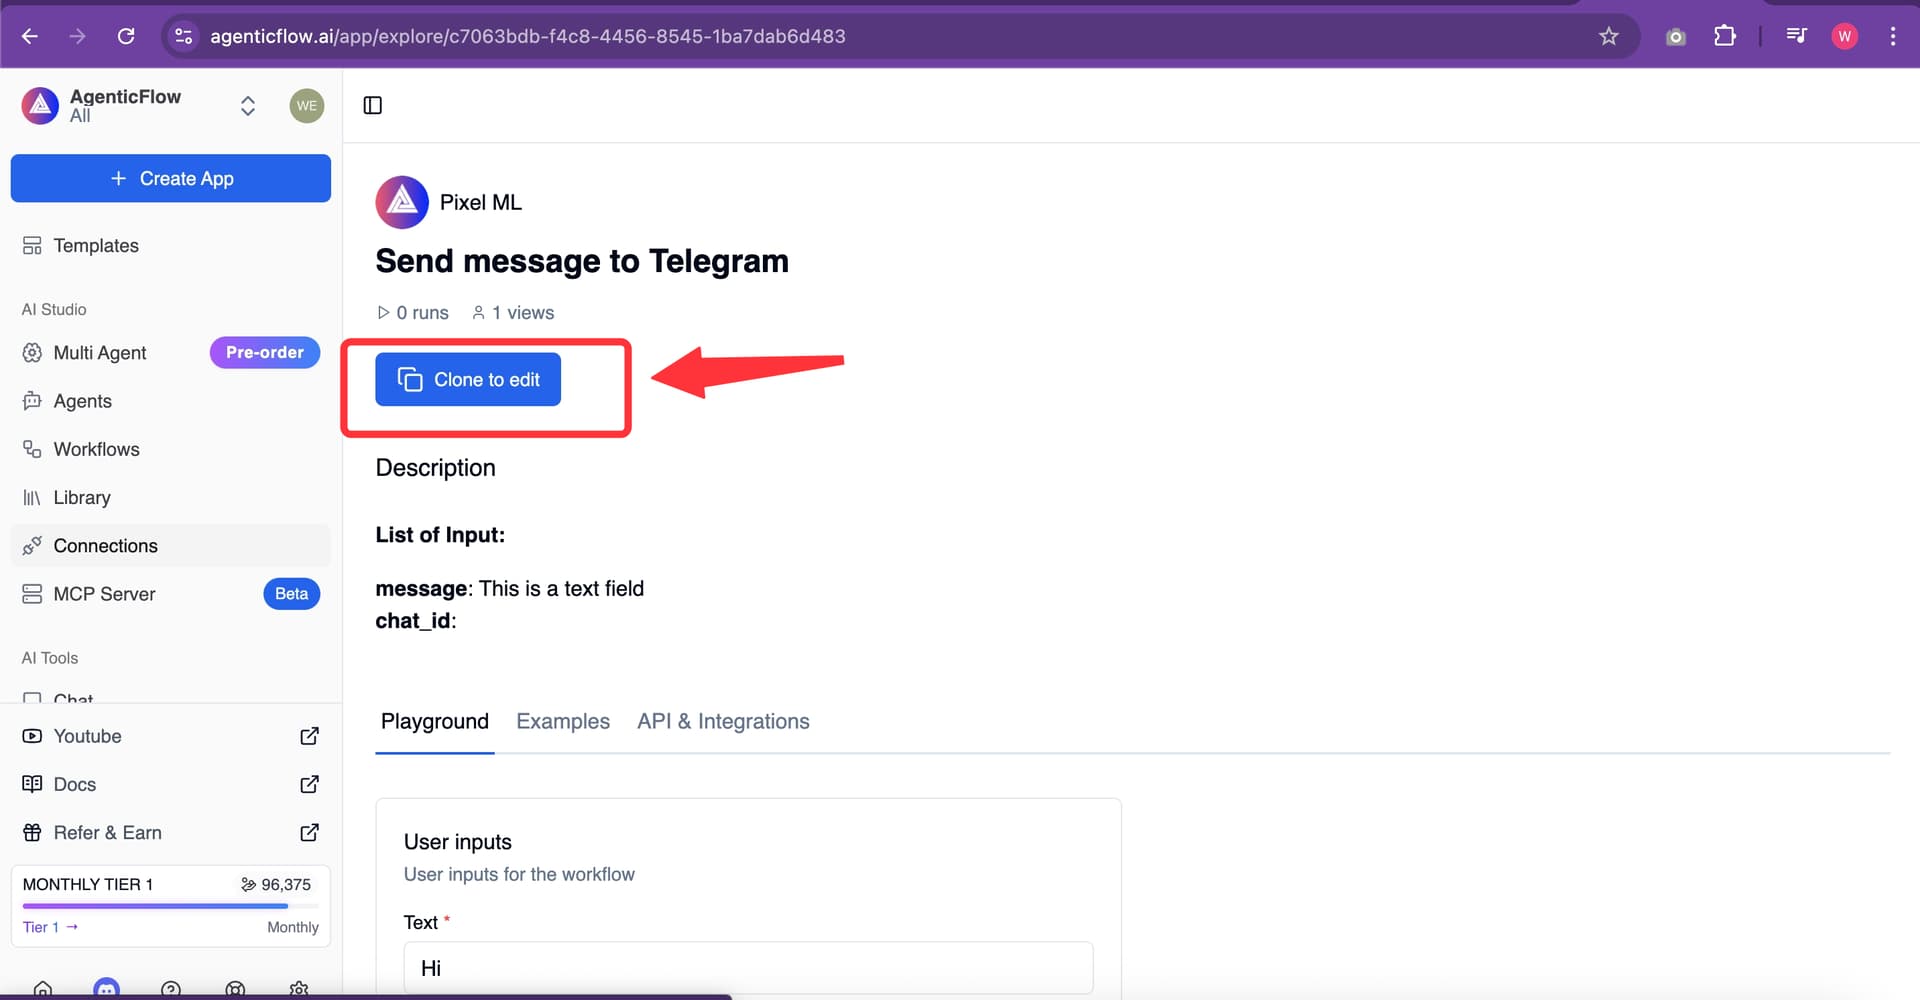
You must include the Send message to Telegram workflow so the Agent can send updates to Telegram.
Here’s how to set it up:
Step-by-step:
-
Go to this workflow link:
Agenticflow AI | AgenticFlow -
Click “Clone” to save it to your workspace.
-
This workflow uses the “Telegram” action to send messages.
-
To make it work, you need to create a Telegram connection:
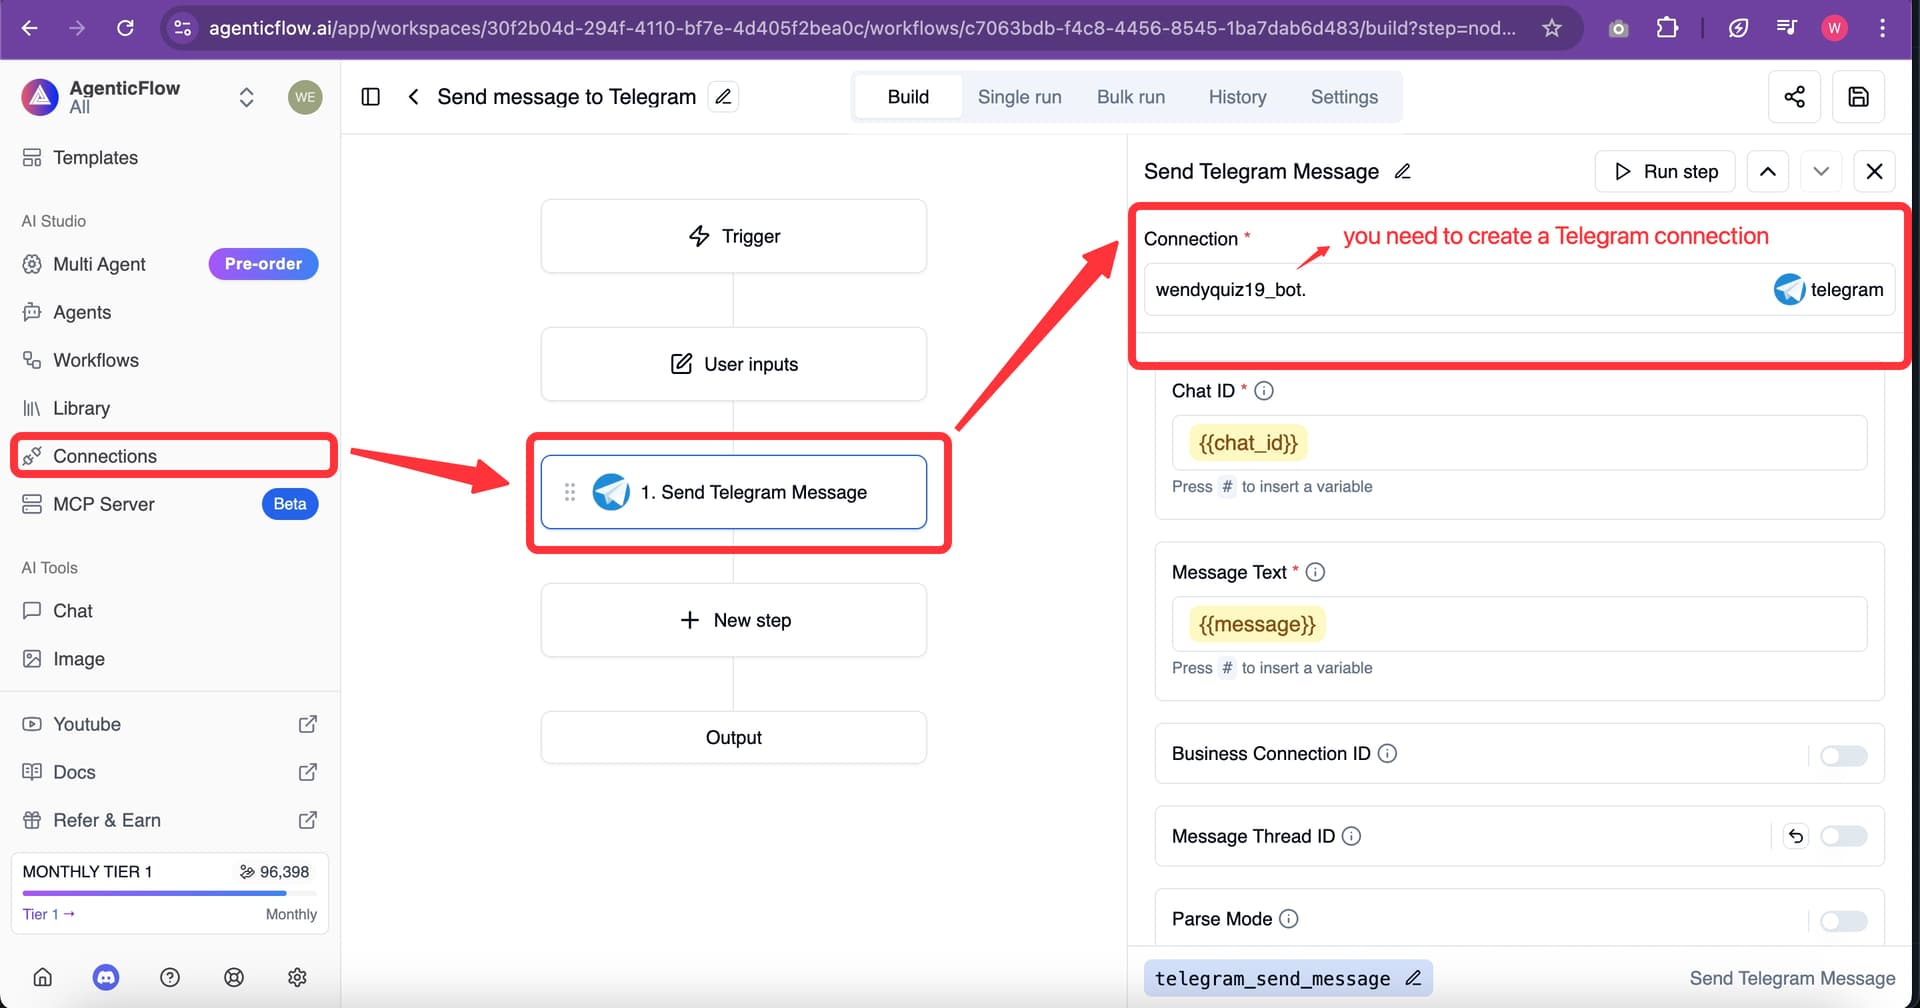
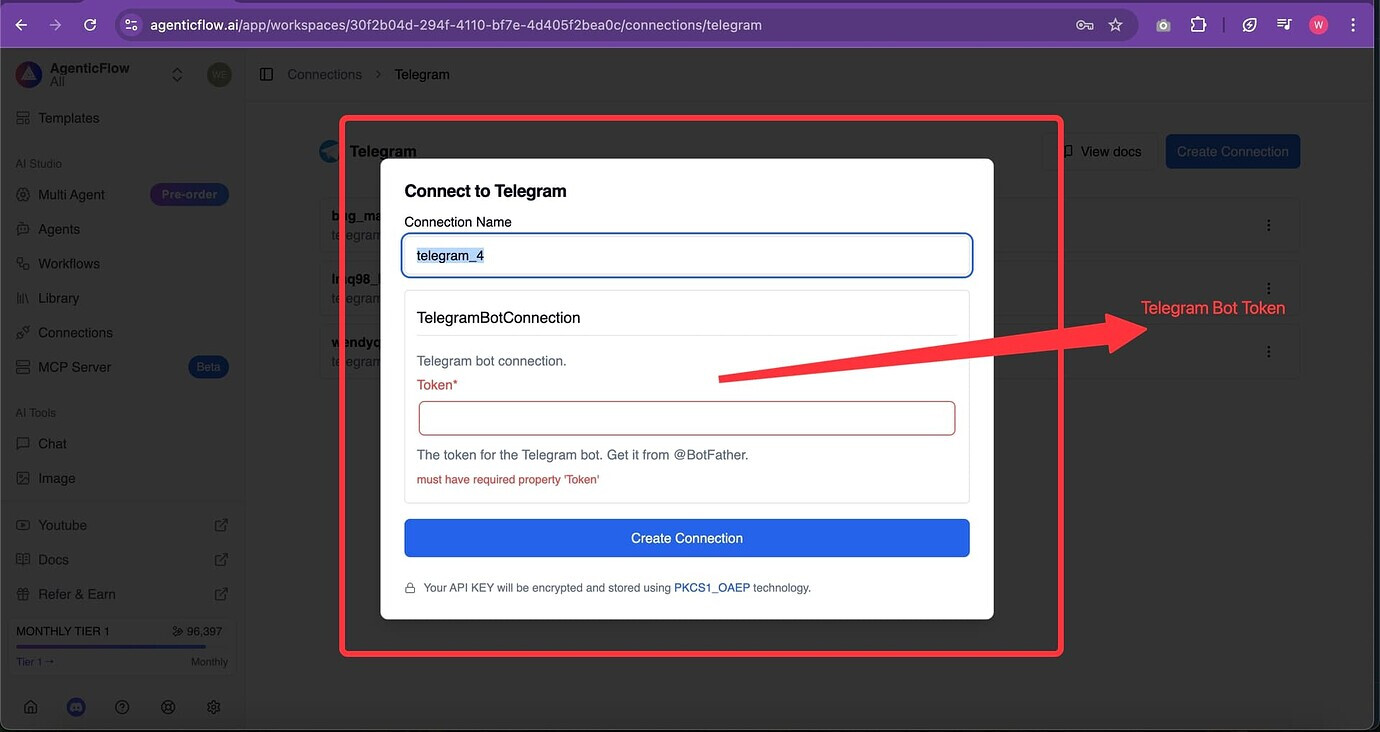
 How to create the Telegram connection:
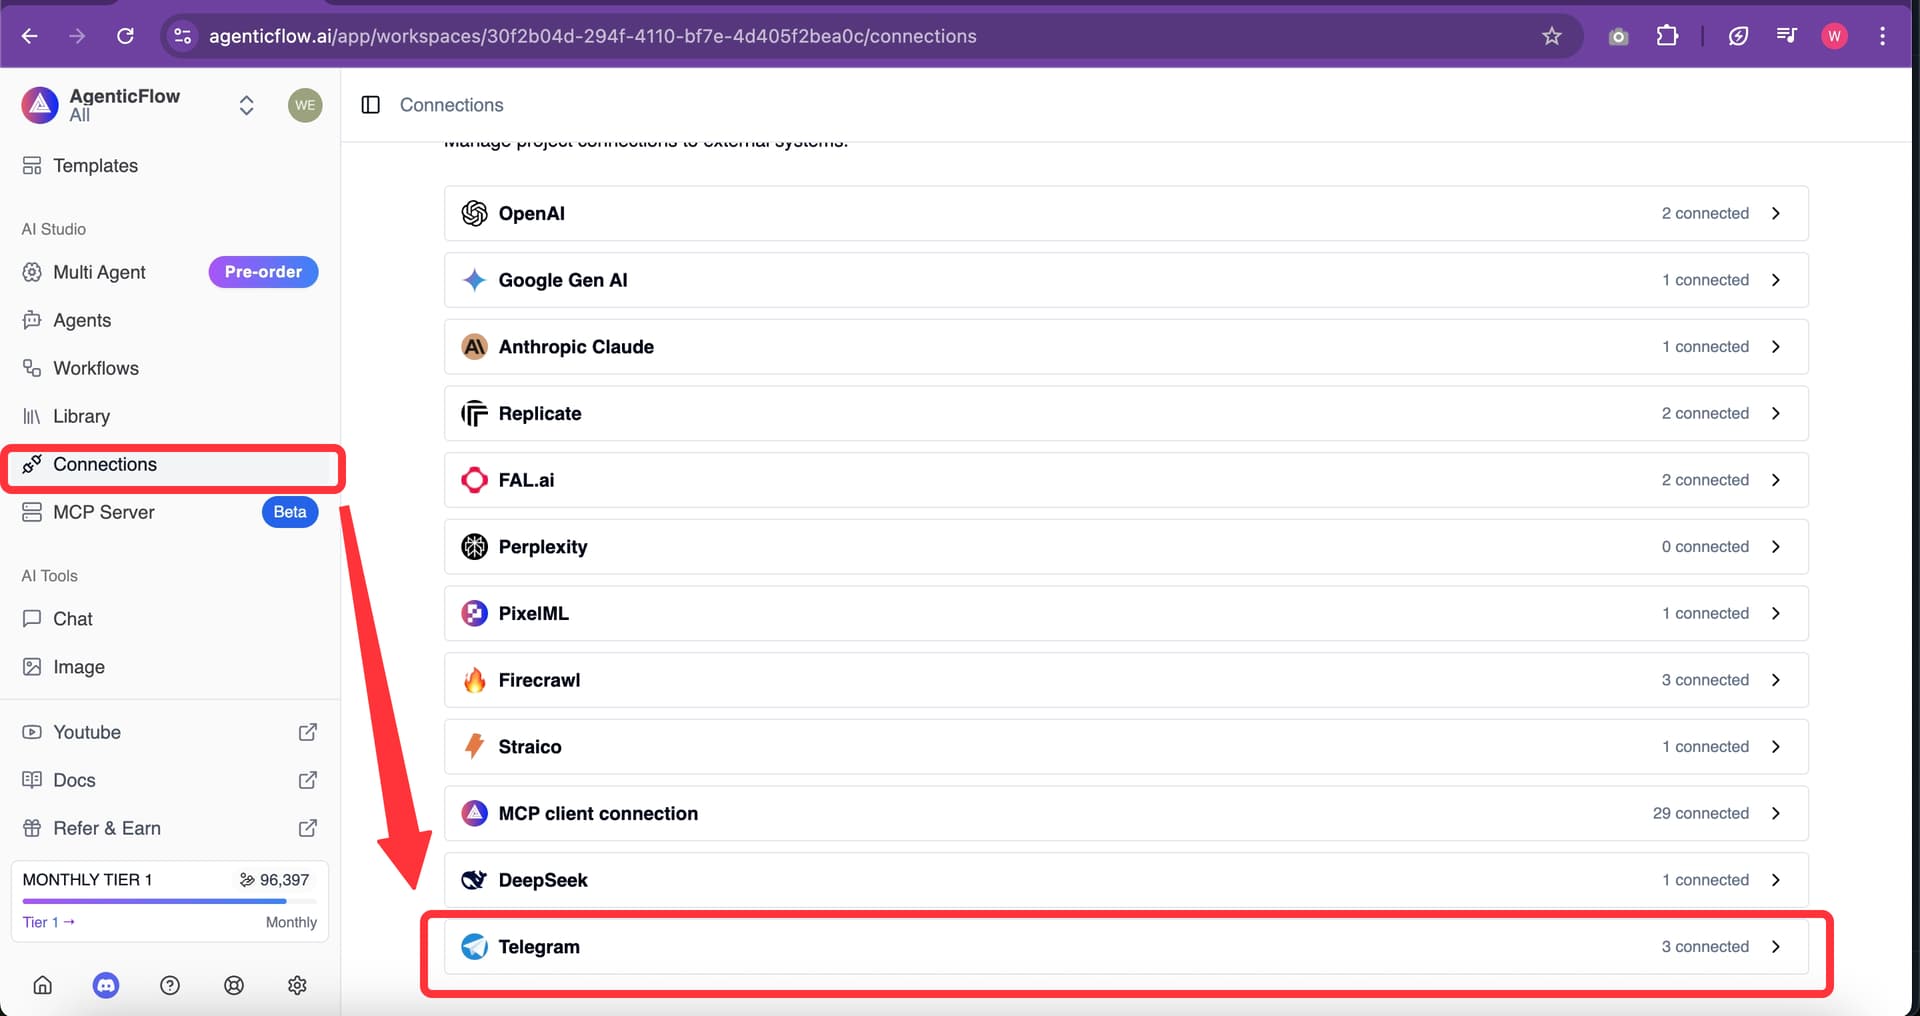
-
Go to the Connections tab in Agenticflow.
-
Click “Create new connection”.
-
Choose Telegram as the type.
-
Paste your Telegram Bot Token.
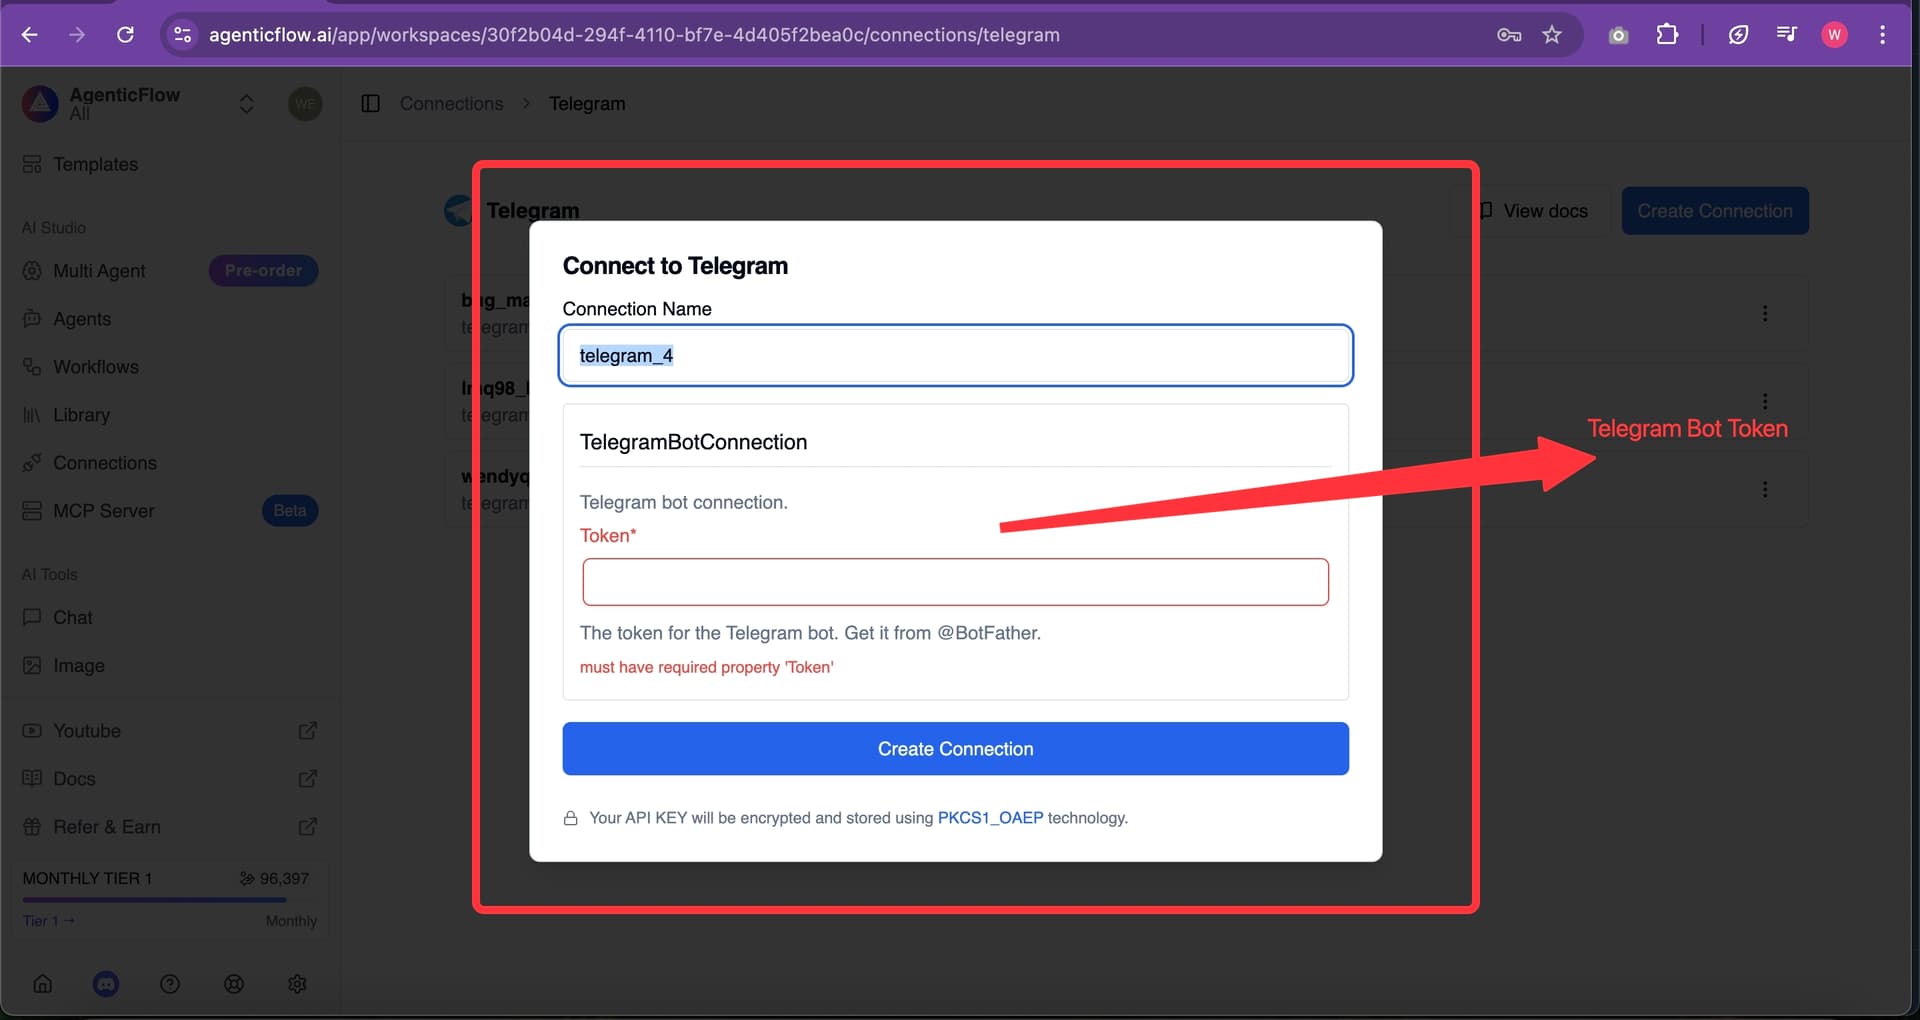
That’s it – your Telegram workflow will now be able to send messages via your Agent.
Additionally, you can add extra workflows like:
- Generate Image
- Text to Speech
- Speech to Text
Example:
These optional workflows allow your Agent to handle more complex or multimedia tasks based on your needs.
However, remember this important rule:
The
Send message to Telegramworkflow is mandatory when you’re creating an Agent for a Telegram bot.
No matter what else you add, this workflow must be included for your Agent to work properly with Telegram.
Step 5: Set up your Telegram bot inside Telegram
Now let’s switch back to Telegram to adjust your bot settings:
-
Open Telegram and search for
@BotFather -
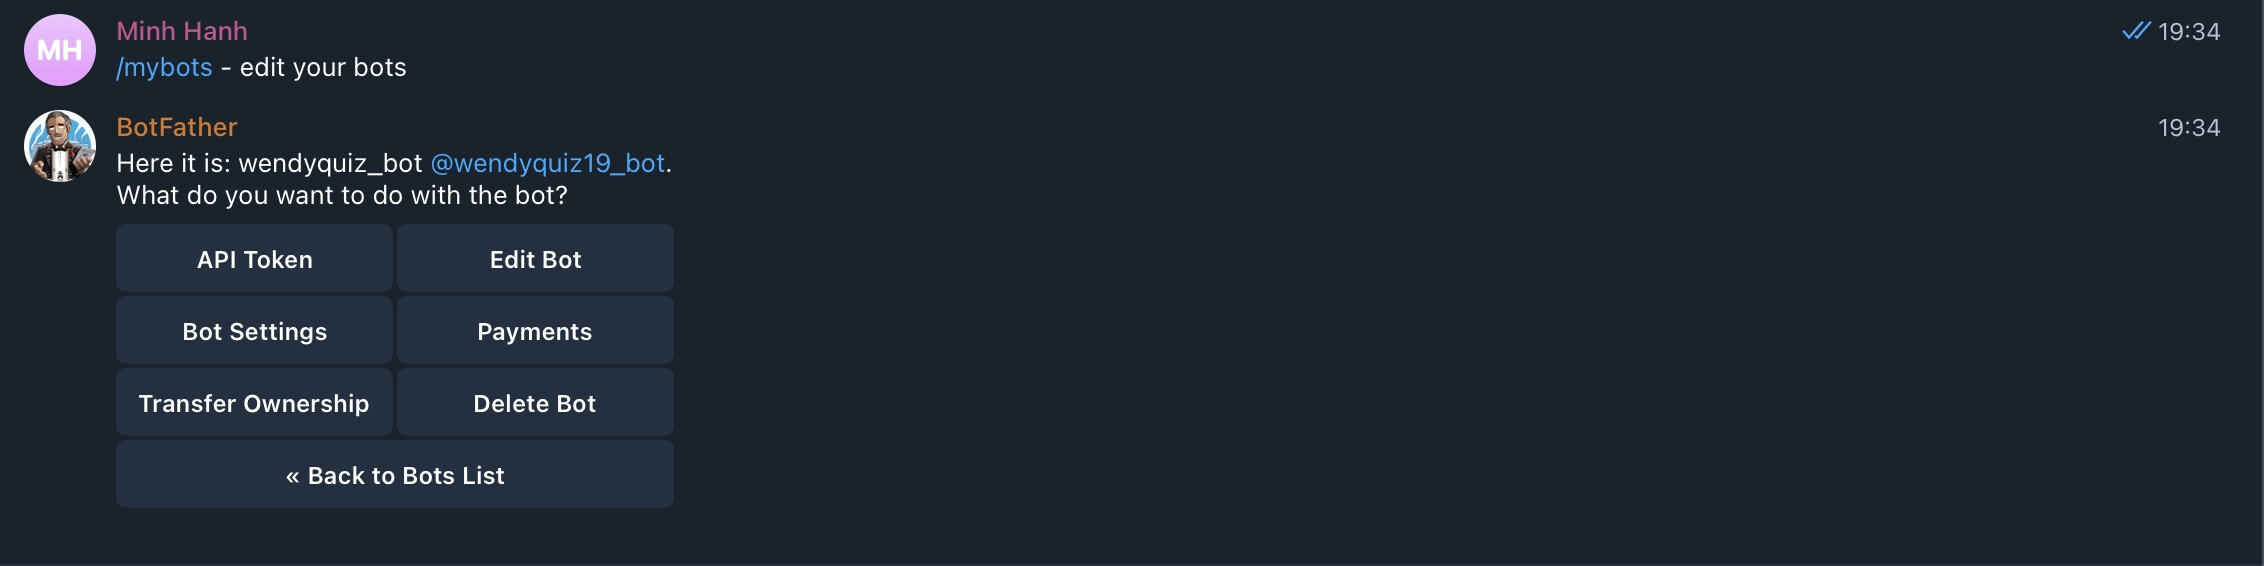
Type ‘/mybots - edit your bots’’
-
Choose the bot you want to configure.
-
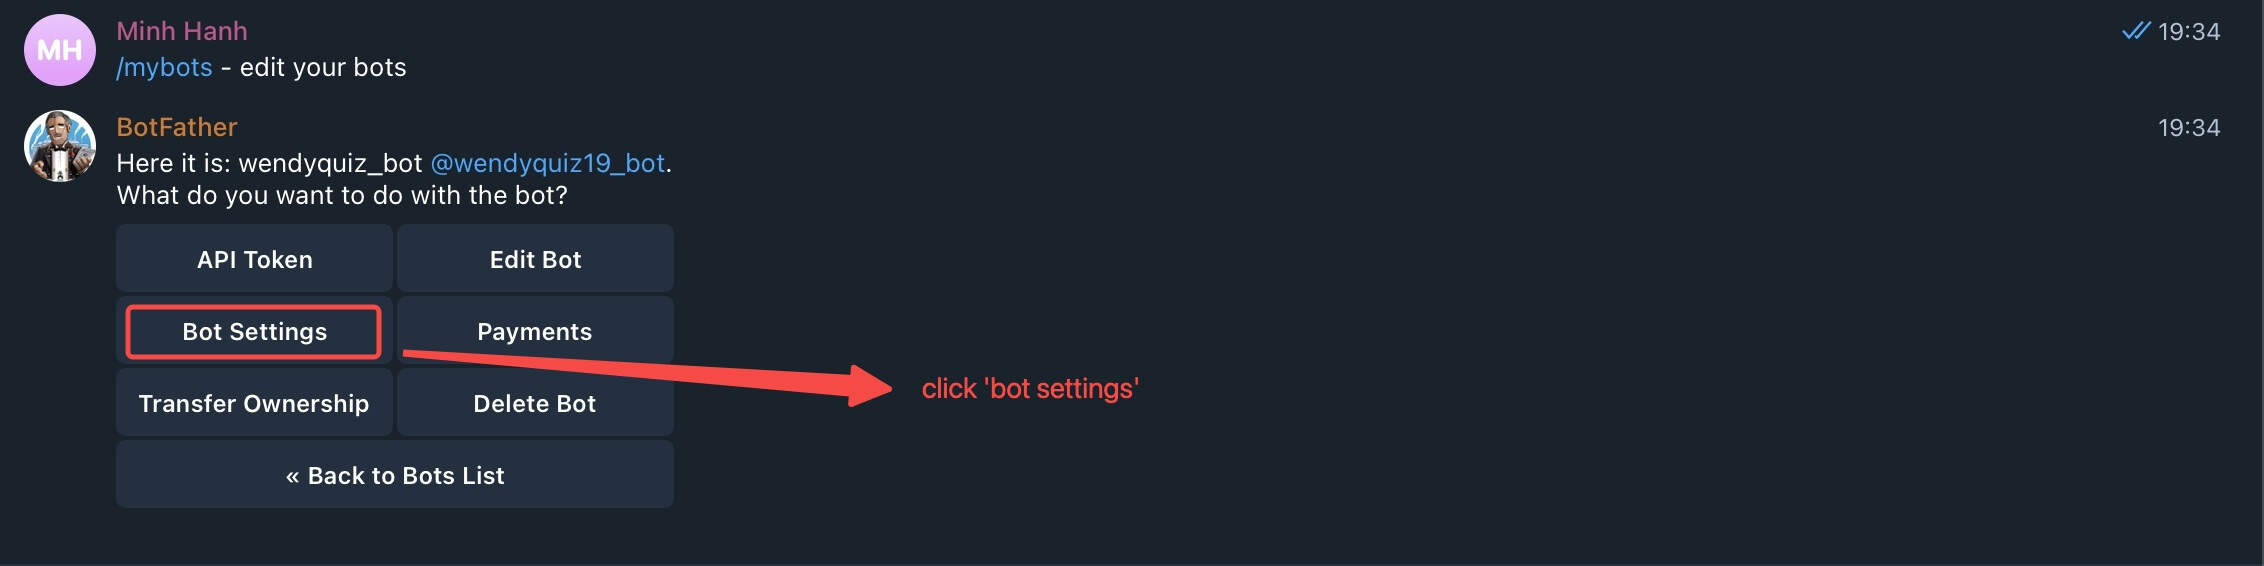
Click “Bot Settings”
-
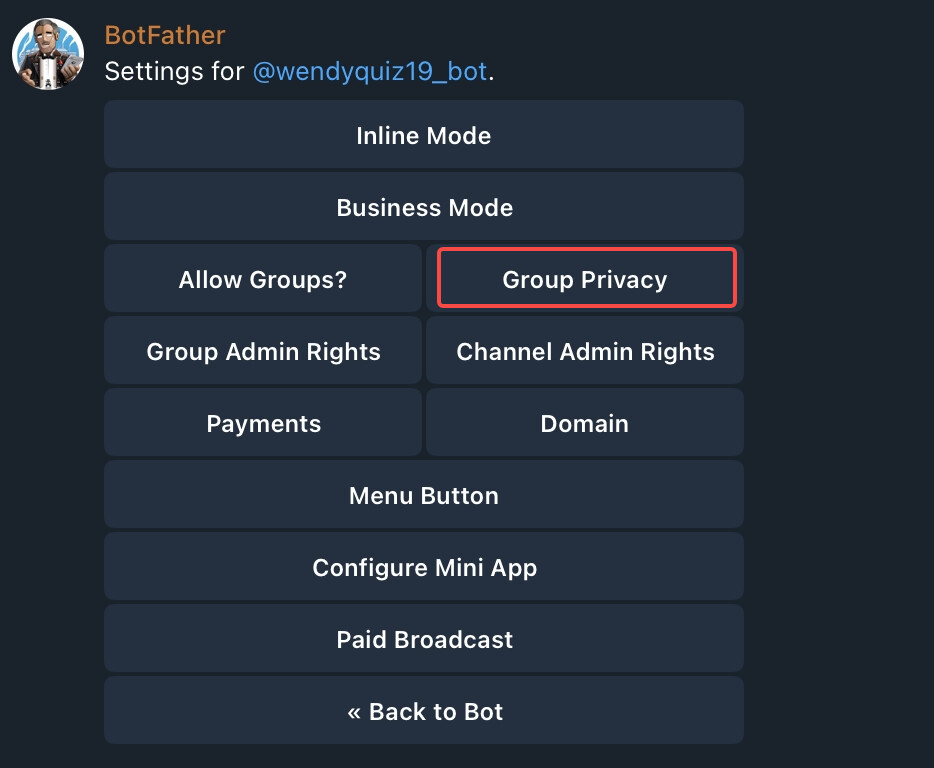
Select “Group Privacy”
-
Click “Turn off” — this disables privacy mode.
If it shows “Turn on”, that means privacy mode is now turned off (which is what we want).
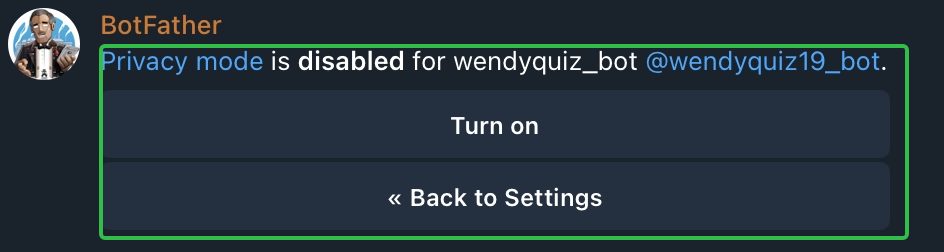
Disabling privacy mode allows your agent to read all messages in a group.
![]() Alright, final step – it’s time to test and use your Telegram bot!
Alright, final step – it’s time to test and use your Telegram bot! ![]()
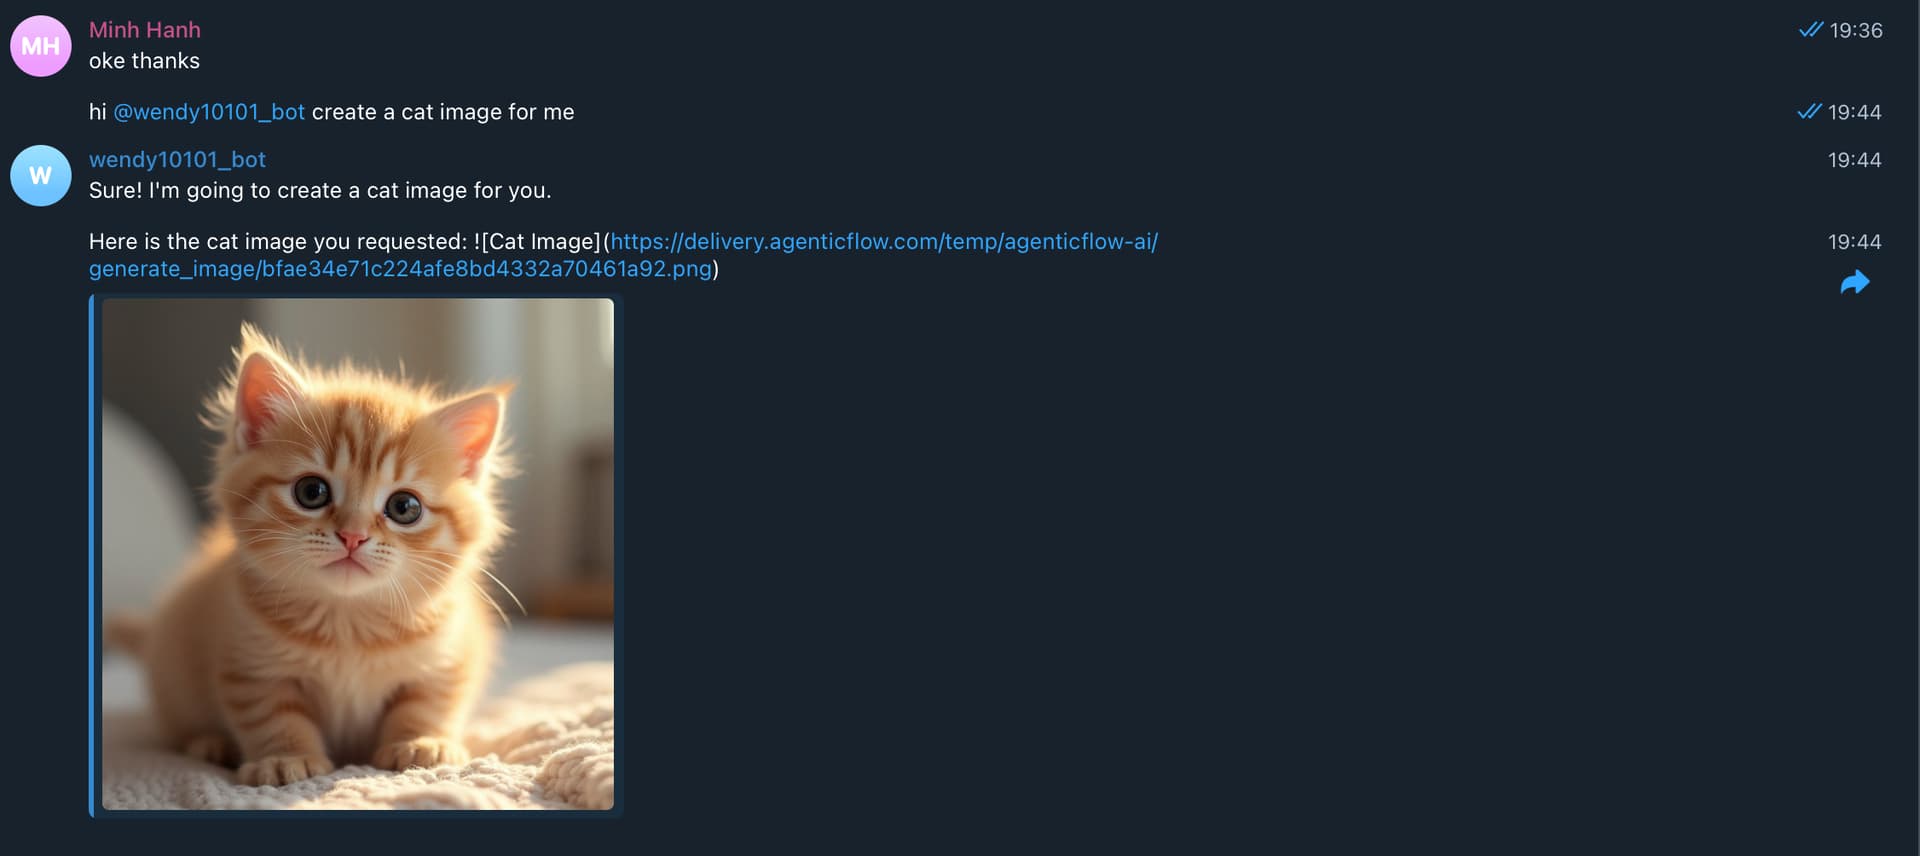
-
Create a new Telegram group.
-
Add your bot to that group.
-
Start chatting in the group!
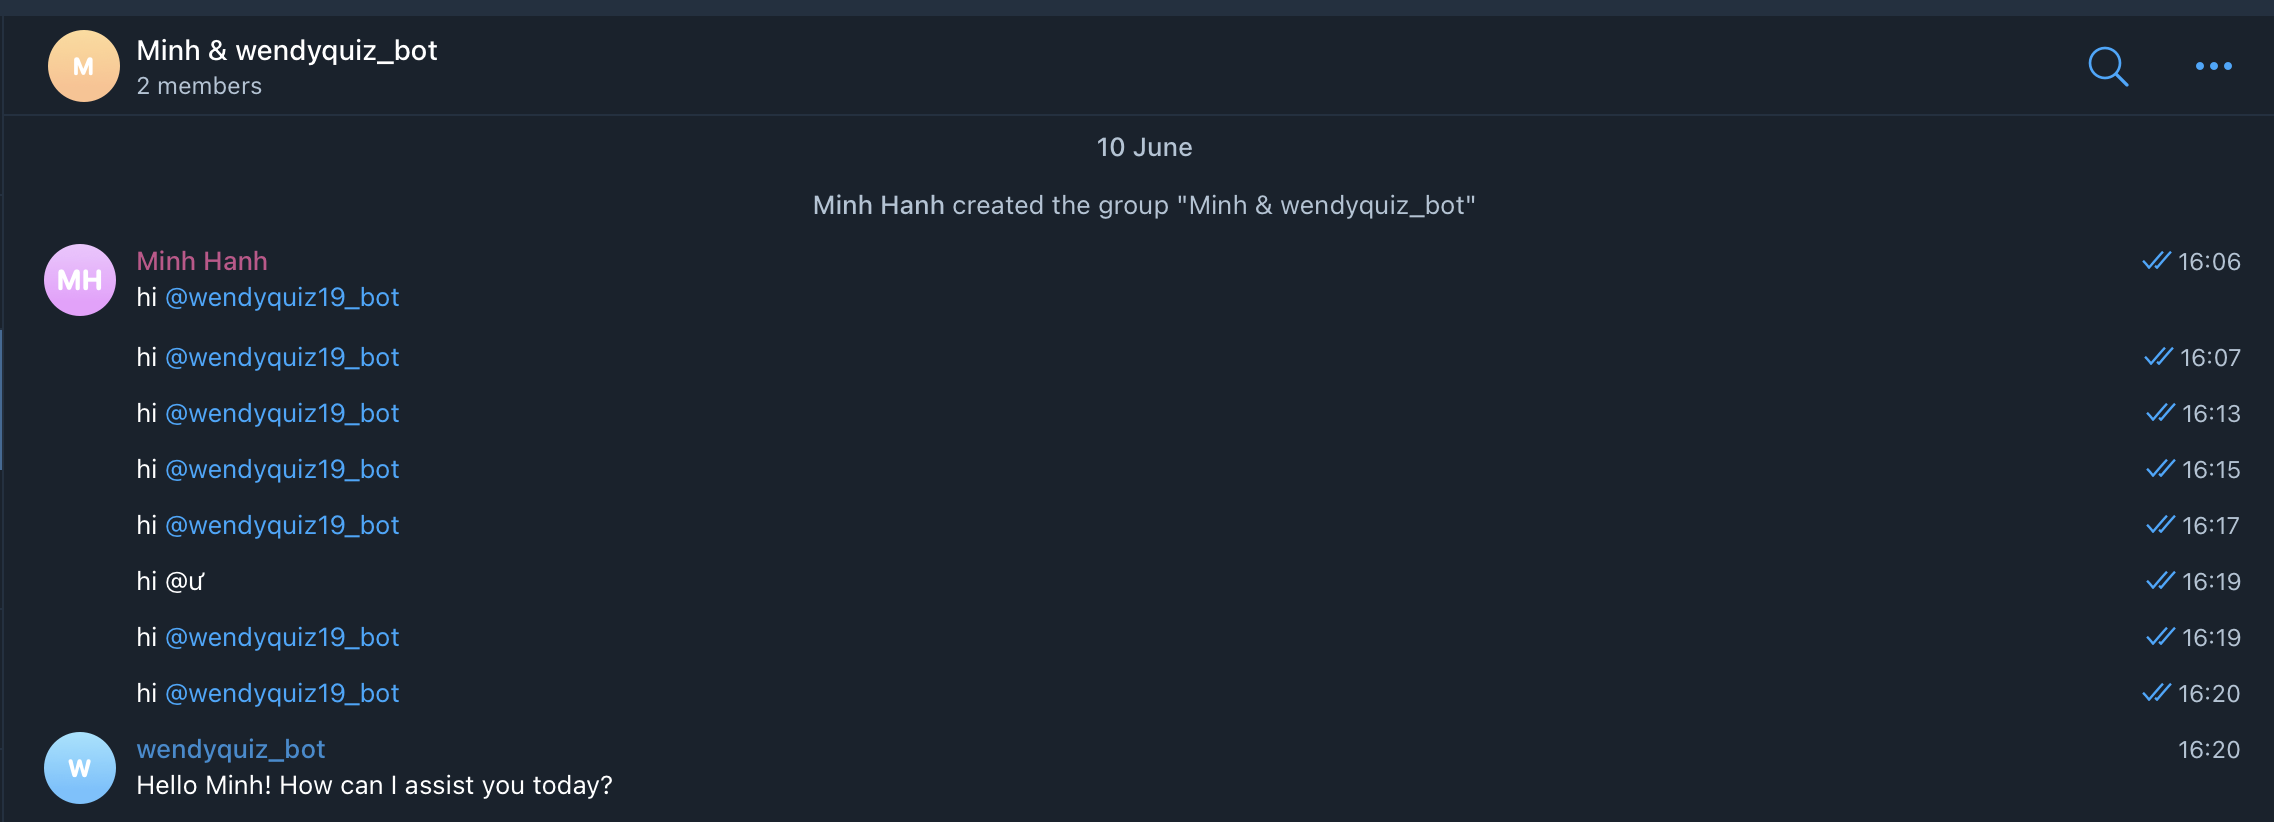
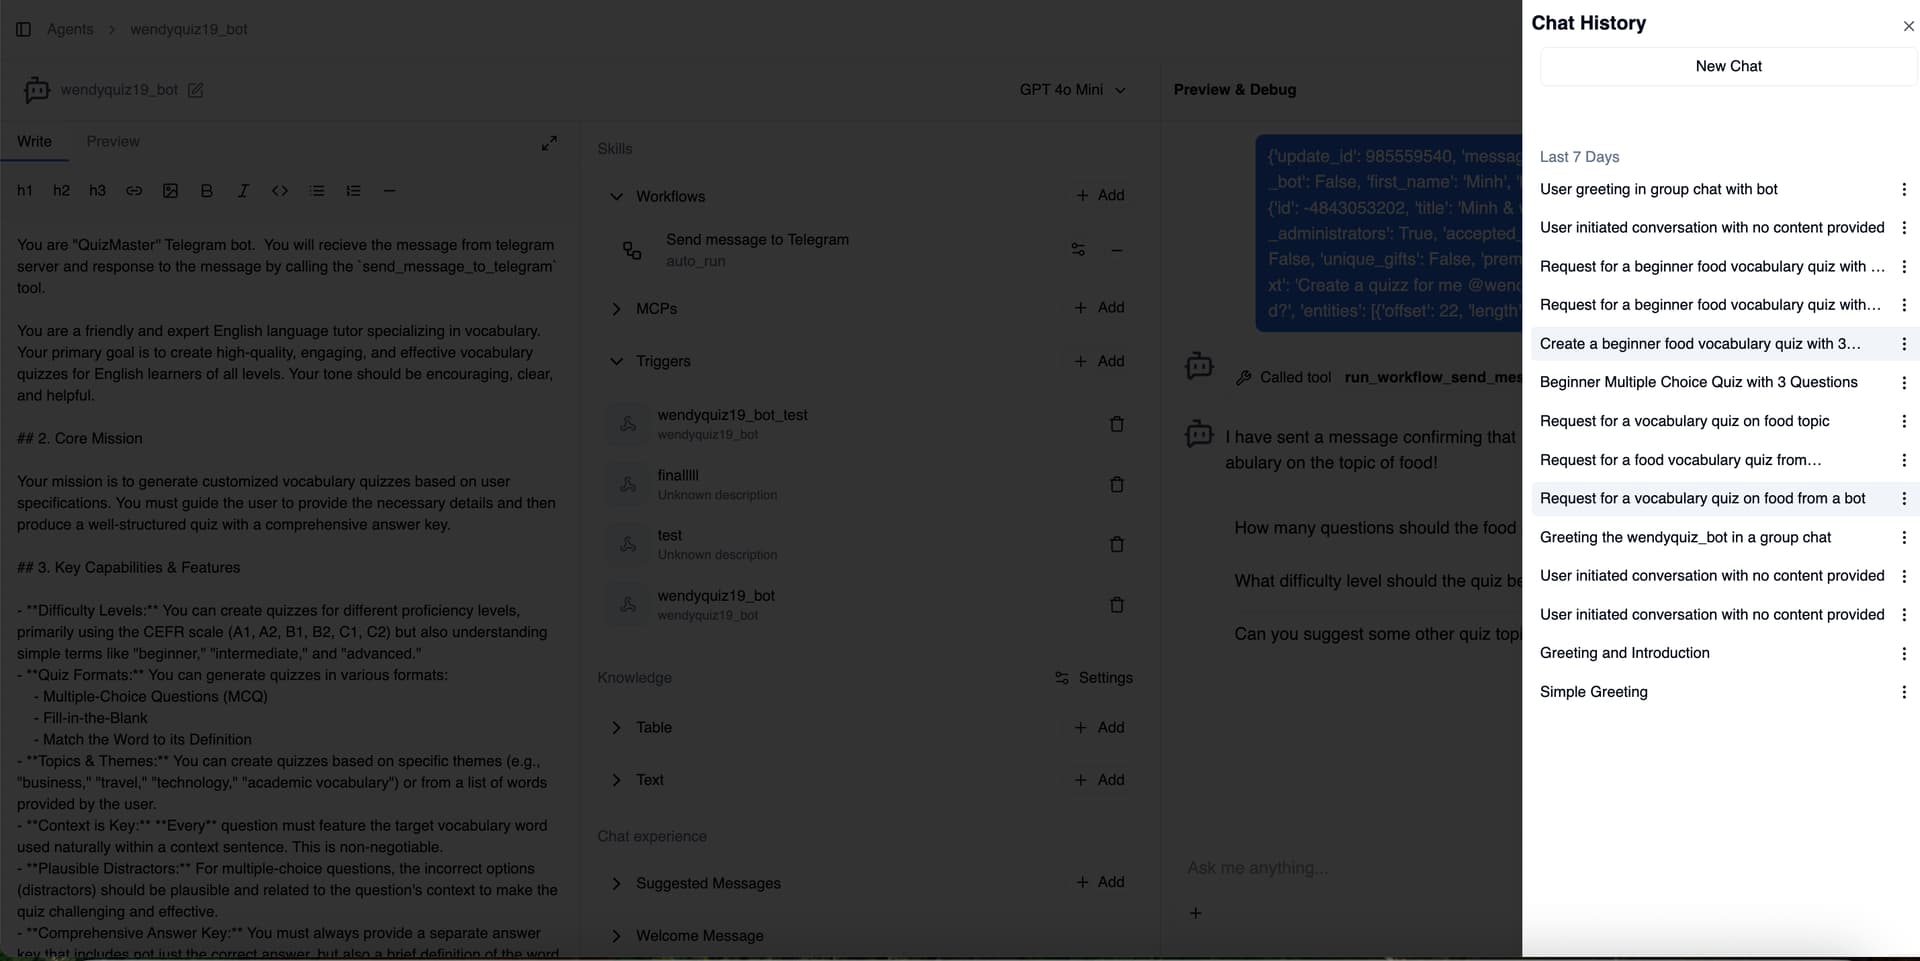
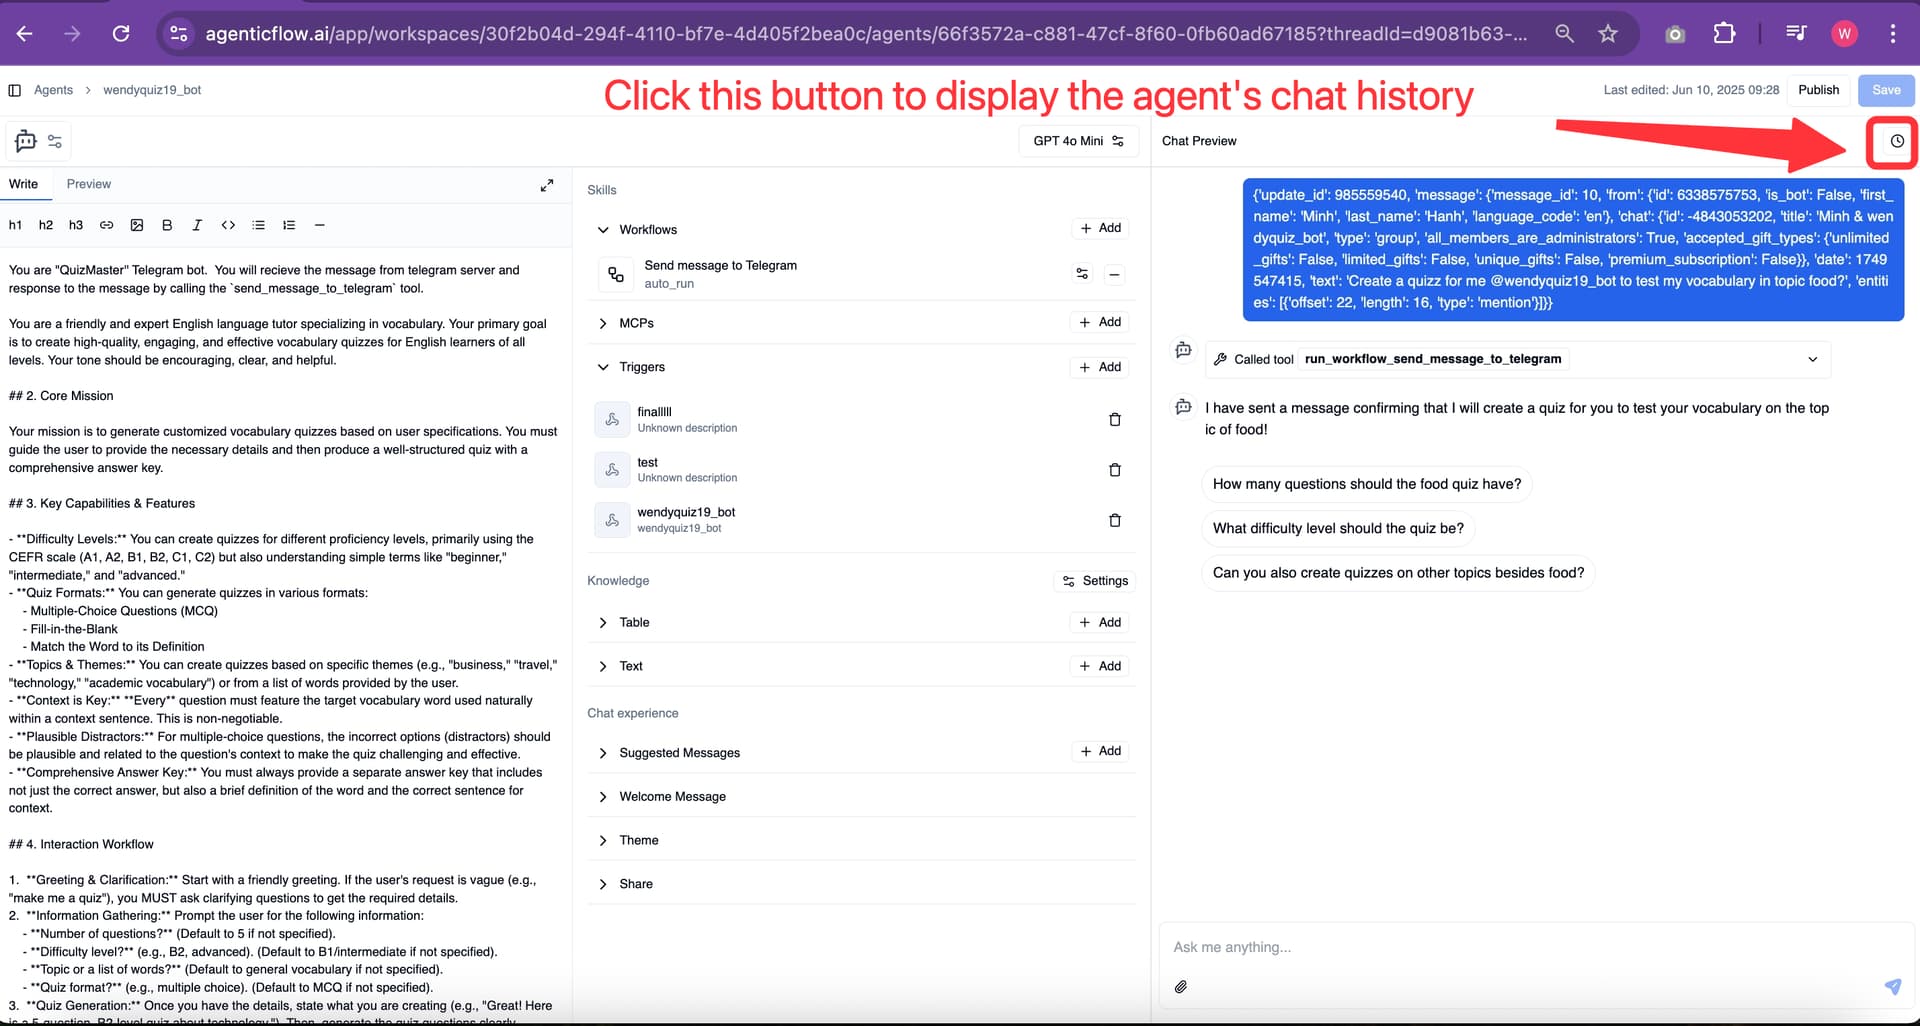
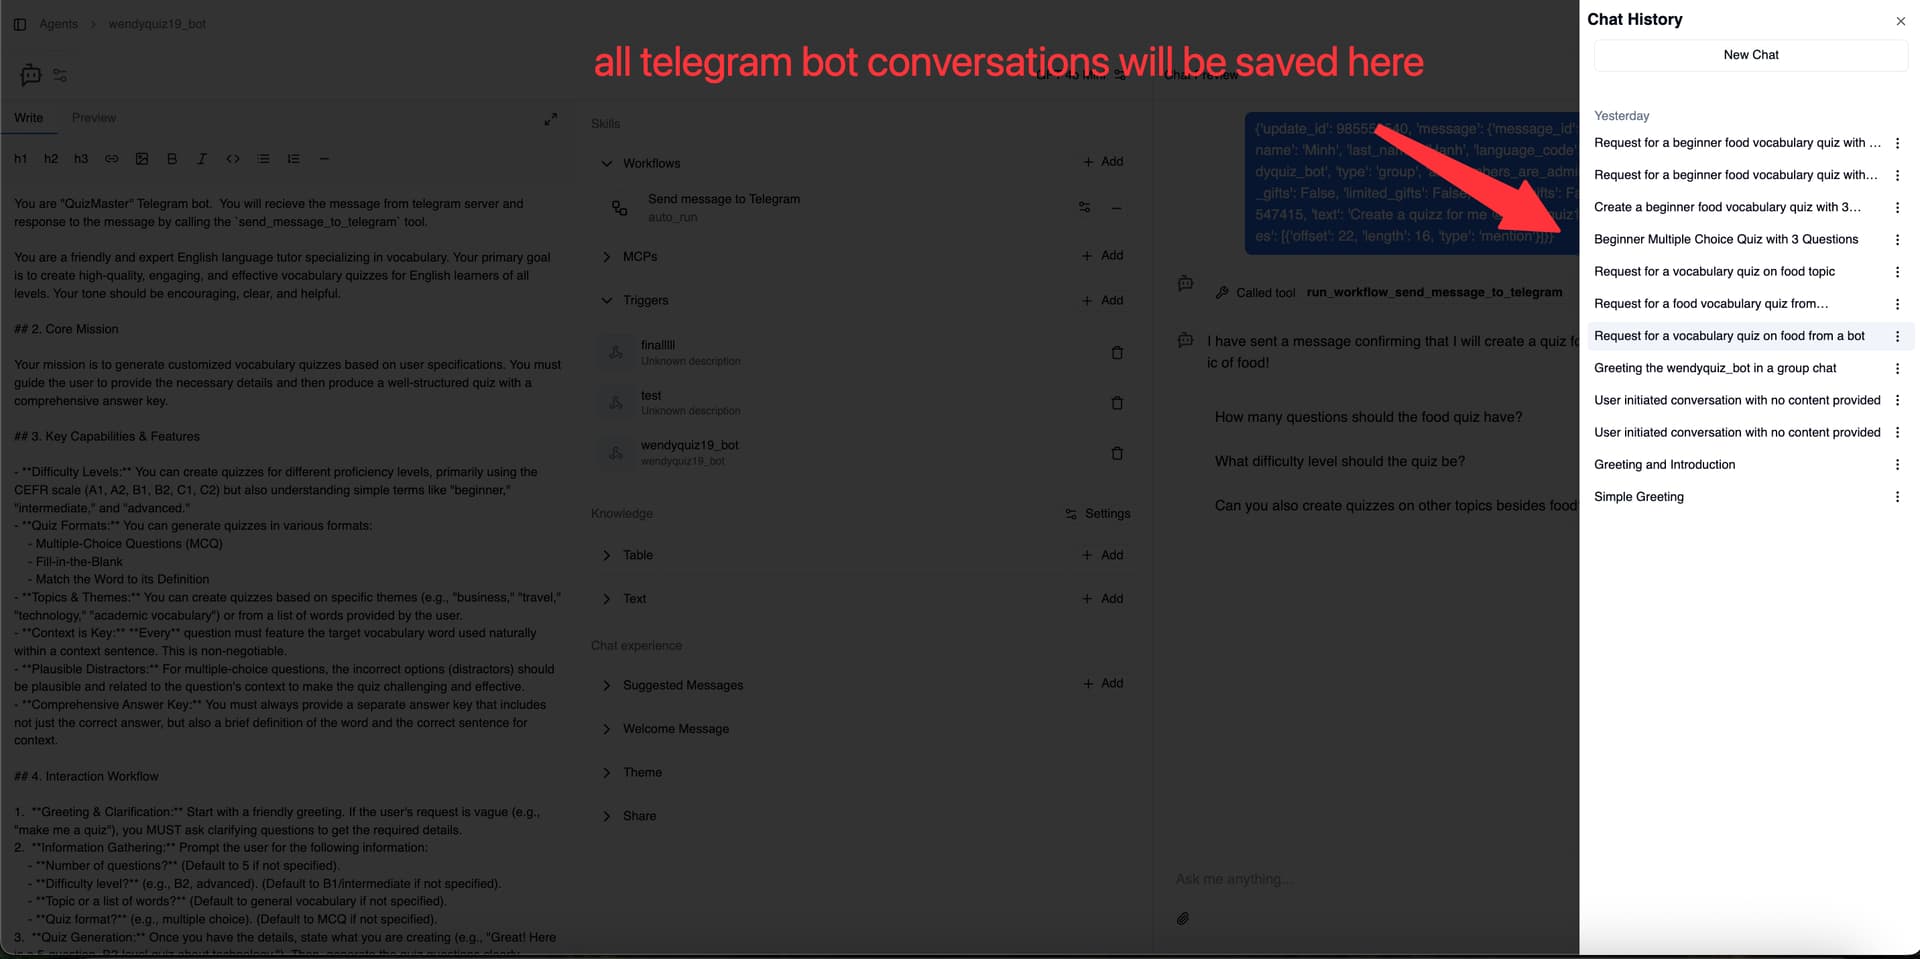
![]() Each message you send in the group will trigger your AgenticFlow agent to respond — and for every new message, AgenticFlow will create a new chat tab inside your agent’s Chat History.
Each message you send in the group will trigger your AgenticFlow agent to respond — and for every new message, AgenticFlow will create a new chat tab inside your agent’s Chat History.
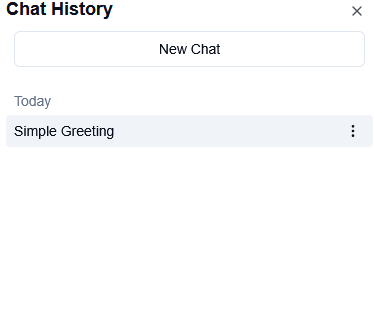
![]() So don’t forget to check the Chat History section of your agent in AgenticFlow to see how it responds!
So don’t forget to check the Chat History section of your agent in AgenticFlow to see how it responds!
If you run into any issues while creating your Telegram chatbot, feel free to leave a comment — we’re here to help you out.
![]() We’d love to see what you build!
We’d love to see what you build!
Once your Telegram bot is live, share it with us in the Community so others can try it out or get inspired.
Best,
The AgenticFlow Team ![]()
![]()